Category: Blog

  • Mastering AI Coding: The Universal Playbook of Tips, Tricks, and Patterns

    Mastering AI Coding: The Universal Playbook of Tips, Tricks, and Patterns

    I’ve spent the last year deep in the trenches with every major AI coding tool. I’ve built everything from simple MVPs to complex agents, and if there’s one thing I’ve learned, it’s that the tools change, but the patterns remain consistent.

    I’ve already written deep-dive guides on some of these tools – Claude Code, Amp Code, Cursor, and even a Vibe Coding manifesto.

    So this post is the meta-playbook, the “director’s cut”, if you will. Everything I’ve learned about coding with AI, distilled into timeless principles you can apply across any tool, agent, or IDE.

    Pattern 1: Document Everything

    AI coding tools are only as good as the context you feed them. If you and I asked ChatGPT to suggest things to do in Spain, we’ll get different answers because it has different context about each of us.

    So before you even start working with coding agents, you need to ensure you’ve got the right context.

    1. Project Documentation as Your AI’s Brain

    Every successful AI coding project starts with documentation that acts as your AI’s external memory. Whether you’re using Cursor’s .cursorrules, Claude Code’s CLAUDE.md, or Amp’s Agents.md, the pattern is identical:

    • Project overview and goals – What are you building and why?
    • Architecture decisions – How is the codebase structured?
    • Coding conventions – What patterns does your team follow?
    • Current priorities – What features are you working on?

    Pro Tip: Ask your AI to generate this documentation first, then iterate on it. It’s like having your AI interview itself about your project.

    2. The Selective Context Strategy

    Most people either give the AI zero context (and get code slop) or dump their entire codebase into the context window (and overwhelm the poor thing).

    The sweet spot? Surgical precision.

    Markdown
    Bad Context: "Here's my entire React app, fix the bug"
    Good Context: "This authentication component (attached) is throwing errors when users log in. Here's the error message and the auth service it calls. Fix the login flow."

    3. The Living Documentation Pattern

    Your AI context isn’t set-it-and-forget-it. Treat it like a living document that evolves with your project. After major features or architectural changes, spend 5 minutes updating your context files.

    Think of it like this: if you hired a new developer, what would they need to know to be productive? That’s exactly what your AI needs.

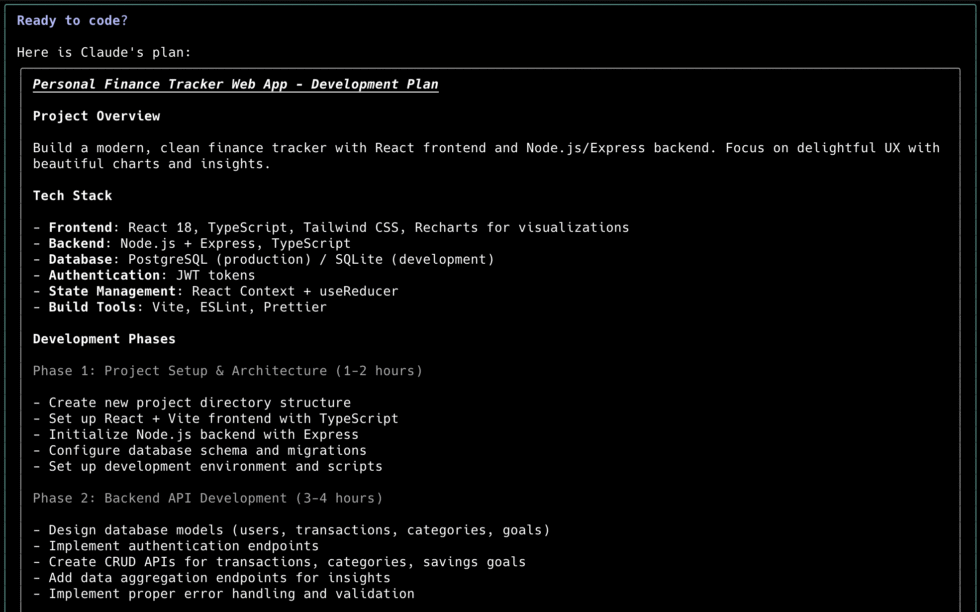
    Pattern 2: Planning Before Code

    When you jump straight into coding mode, you’re essentially asking your AI to be both the architect and the construction worker… at the same time. It might work for a treehouse but not a mansion.

    Step 1: Start with a conversation, not code. Whether you’re in Cursor’s chat, Claude Code’s planning mode, or having a dialogue with Amp, begin with:

    Markdown
    "I want to build [basic idea]. Help me flesh this out by asking questions about requirements, user flows, and technical constraints."

    The AI will ping-pong with you, asking clarifying questions that help you think through edge cases you hadn’t considered.

    Step 2: Once requirements are solid, get architectural:

    Markdown
    "Based on these requirements, suggest a technical architecture. Consider:
    - Database schema and relationships
    - API structure and endpoints
    - Frontend component hierarchy
    - Third-party integrations needed
    - Potential scaling bottlenecks"

    Step 3: Once we’ve sorted out the big picture, we can get into the details. Ask your AI:

    Markdown
    "Break this down into MVP features vs. nice-to-have features. What's the smallest version that would actually be useful?"

    The Feature Planning Framework

    For each feature, follow this pattern:

    1. User story definition – What does the user want to accomplish?
    2. Technical breakdown – What components, APIs, and data models are needed?
    3. Testing strategy – How will you know it works?
    4. Integration points – How does this connect to existing code?

    Save these plans as markdown files. Your AI can reference them throughout development, keeping you on track when scope creep tries to derail your focus.

    Pattern 3: Incremental Development

    Building in small, testable chunks, is good software engineering practice. Instead of building the whole MVP in one shot, break off small chunks and work on that with the AI in separate conversations.

    The Conversation Management Pattern

    Every AI coding tool has context limits. Even the ones with massive context windows get confused when conversations become novels. Here’s the universal pattern:

    Short Conversations for Focused Features

    • One conversation = one feature or one bug fix
    • When switching contexts, start a new conversation
    • If a conversation hits 50+ exchanges, consider starting fresh

    When starting a new conversation, give your AI a briefing:

    Markdown
    "I'm working on the user authentication feature for our React app. 
    Previous context: We have a Node.js backend with JWT tokens and a React frontend.
    Current task: Implement password reset functionality.
    Relevant files: auth.js, UserController.js, and Login.component.jsx"
    

    The Test-Driven AI Workflow

    This is the secret sauce that separates the pros from the wannabes. Instead of asking for code directly, ask for tests first:

    Markdown
    "Write tests for a password reset feature that:
    1. Sends reset emails
    2. Validates reset tokens
    3. Updates passwords securely
    4. Handles edge cases (expired tokens, invalid emails, etc.)"
    

    Why this works:

    • Tests force you to think through requirements
    • AI-generated tests catch requirements you missed
    • You can verify the tests make sense before implementing
    • When implementation inevitably breaks, you have a safety net

    The Iterative Refinement Strategy

    Don’t expect perfection on the first try. The best AI-assisted development follows this loop:

    1. Generate – Ask for initial implementation
    2. Test – Run the code and identify issues
    3. Refine – Provide specific feedback about what’s broken
    4. Repeat – Until it works as expected
    Markdown
    "The login function you generated works, but it's not handling network errors gracefully. Add proper error handling with user-friendly messages and retry logic."
    

    Pattern 4: Always Use Version Control

    When you’re iterating fast with AI coding, the safest, sanest way to move is to create a new branch for every little feature, fix, or experiment. It keeps your diffs tiny, and creates multiple checkpoints that you can roll back to when something goes wrong.

    The Branch-Per-Feature Philosophy

    Just like you should start a new chat for every feature, make it a habit to also create a new git branch. With Claude Code you can create a custom slash command that starts a new chat and also creates a new branch at the same time.

    Here’s why this matters more with AI than traditional coding:

    • AI generates code in bursts. When Claude Code or Cursor spits out 200 lines of code in 30 seconds, you need a clean way to isolate and evaluate that change before it touches your main branch.
    • Experimentation becomes frictionless. Want to try two different approaches to the same problem? Spin up two branches and let different AI instances work on each approach. Compare the results, keep the winner, delete the loser.
    • Rollbacks are inevitable. That beautiful authentication system your AI built? It might work perfectly until you discover it breaks your existing user flow. With proper branching, rollback is one command instead of hours of manual cleanup.

    Test Before You Commit

    Just like your dating strategy, you want to test your code before you actually commit it. Ask the AI to run tests, see if it builds correctly, and try your app on your localhost.

    Commit code only when you are completely satisfied that everything is in order. See more on testing in Pattern 7.

    Oh and just so you know, code that works on your development environment may not work on production. I recently ran into an issue where my app was loading blazingly fast on my local dev environment, but when I deployed it to the cloud it took ages to load.

    I asked my AI to identify it and it looked through my commit history to isolate that it was because we added more data to our DB, which is fast locally but takes time in production. Which brings me to…

    The Commit Message Strategy for AI Code

    Your commit messages become crucial documentation when working with AI. Future you (and your team) need to know:

    Bad commit message:

    Markdown
    Add dashboard

    Good commit message:

    Markdown
    Implement user dashboard with analytics widgets
    
    - Created DashboardComponent with React hooks
    - Added API integration for user stats
    - Responsive grid layout with CSS Grid
    - Generated with Cursor AI, manually reviewed for security
    - Tested with sample data, needs real API integration
    
    Co-authored-by: AI Assistant

    This tells the story: what was built, how it was built, what still needs work, and acknowledges AI involvement.

    Version Control as AI Training Data

    Your git history becomes a training dataset for your future AI collaborations. Clean, descriptive commits help you give better context to AI tools:

    “I’m working on the user authentication system. Here’s the git history of how we built our current auth (git log –oneline auth/). Build upon this pattern for the new OAuth integration.”

    The better your git hygiene, the better context you can provide to AI tools for future development.

    Pattern 5: Review Code Constantly

    AI can generate code faster than you can blink, but it can also generate technical debt at light speed. The developers who maintain clean codebases with AI assistance have developed quality control reflexes that activate before anything gets committed.

    The AI Code Review Checklist

    Before accepting any AI-generated code, run through this mental checklist:

    Functionality Review:

    • Does this actually solve the problem I described?
    • Are there edge cases the AI missed?
    • Does the logic make sense for our specific use case?

    Integration Review:

    • Does this follow our existing patterns and conventions?
    • Will this break existing functionality?
    • Are the imports and dependencies correct?

    Security Review:

    • Are there any obvious security vulnerabilities?
    • Is user input being validated and sanitized?
    • Are secrets and sensitive data handled properly?

    Performance Review:

    • Are there any obvious performance bottlenecks?
    • Is this approach scalable for our expected usage?
    • Are expensive operations being cached or optimized?

    The Explanation Demand Strategy

    Never accept code you don’t understand. Make it a habit to ask:

    Markdown
    "Explain the approach you took here. Why did you choose this pattern over alternatives? What are the trade-offs?"

    This serves two purposes:

    1. You learn something new (AI often suggests patterns you wouldn’t have thought of)
    2. You catch cases where the AI made suboptimal choices

    The Regression Prevention Protocol

    AI is fantastic at implementing features but terrible at understanding the broader impact of changes. Develop these habits:

    • Commit frequently – Small, atomic commits make it easy to rollback when AI breaks something (see previous section).
    • Run tests after every significant change – Don’t let broken tests pile up
    • Use meaningful commit messages – Your future self will thank you when debugging

    Pattern 6: Handling Multiple AI Instances

    As your projects grow in complexity, you’ll hit scenarios where you need more sophisticated coordination.

    The Parallel Development Pattern

    For complex features, run multiple AI instances focusing on different aspects:

    • Instance 1: Frontend components and user interface
    • Instance 2: Backend API endpoints and database logic
    • Instance 3: Testing, debugging, and integration

    Each instance maintains its own conversation context, preventing the confusion that happens when one AI tries to juggle multiple concerns.

    The Specialized Agent Strategy

    Different AI tools excel at different tasks:

    • Code generation: Claude Code or Amp for rapid prototyping and building features
    • Debugging and troubleshooting: Cursor or GitHub Copilot for inline suggestions
    • Architecture and planning: Claude or Gemini for high-level thinking
    • Testing and quality assurance: Specialized subagents or custom prompts

    The Cross-Tool Context Management

    When working across multiple tools, maintain consistency with shared documentation:

    • Keep architecture diagrams and requirements in a shared location
    • Use consistent naming conventions and coding standards
    • Document decisions and changes in a central wiki or markdown files

    Pattern 7: Debugging and Problem-Solving

    The Universal Debugging Mindset

    AI-generated code will break. Not if, when. The developers who handle this gracefully have internalized debugging patterns that work regardless of which AI tool they’re using.

    The Systematic Error Resolution Framework

    Step 1: Isolate the Problem Don’t dump a wall of error text and hope for magic. Instead:

    Markdown
    "I'm getting this specific error: [exact error message]
    This happens when: [specific user action or condition]
    Expected behavior: [what should happen instead]
    Relevant code: [only the functions/components involved]"

    Step 2: Add Debugging Infrastructure Ask your AI to add logging and debugging information:

    Markdown
    "Add console.log statements to track the data flow through this function. I need to see what's actually happening vs. what should be happening."

    Step 3: Test Hypotheses Methodically Work with your AI to form and test specific hypotheses:

    Markdown
    "I think the issue might be with async timing. Let's add await statements and see if that fixes the race condition."

    The Fallback Strategy Pattern

    When your AI gets stuck in a loop (trying the same failed solution repeatedly), break the cycle:

    1. Stop the current conversation
    2. Start fresh with better context
    3. Try a different approach or tool
    4. Simplify the problem scope

    The Human Override Protocol

    Sometimes you need to step in and solve things manually. Recognize these situations:

    • AI keeps suggesting the same broken solution
    • The problem requires domain knowledge the AI doesn’t have
    • You’re dealing with legacy code or unusual constraints
    • Time pressure makes manual fixes more efficient

    Pattern 8: Scaling and Maintenance

    Building with AI is easy. Maintaining and scaling AI-generated code? That’s where many projects die. The successful long-term practitioners have developed sustainable approaches.

    The Documentation Discipline

    As your AI-assisted codebase grows, documentation becomes critical:

    • Decision logs – Why did you choose certain approaches?
    • Pattern libraries – What conventions emerged from your AI collaboration?
    • Gotcha lists – What quirks and limitations did you discover?
    • Onboarding guides – How do new team members get productive quickly?

    The Refactoring Rhythm

    Schedule regular refactoring sessions where you:

    • Clean up AI-generated code that works but isn’t optimal
    • Consolidate duplicate patterns
    • Update documentation and context files
    • Identify technical debt before it becomes problematic

    The Knowledge Transfer Strategy

    Don’t become the only person who understands your AI-generated codebase:

    • Share your prompting strategies with the team
    • Document your AI tool configurations and workflows
    • Create reusable templates and patterns
    • Train other team members on effective AI collaboration

    Pattern 9: Mindset and Workflow

    Reframing Your Relationship with AI

    The most successful AI-assisted developers have fundamentally reframed how they think about their relationship with AI tools. Think of your role as:

    • An editor: curating drafts, not creating everything from scratch.
    • A director: guiding talented actors (the AIs) through each scene.
    • A PM: breaking down the problem into tickets.

    The Collaborative Mindset Shift

    From “AI will do everything” to “AI will accelerate everything”

    AI isn’t going to architect your application or make strategic decisions. But it will implement your ideas faster than you thought possible, generate boilerplate you’d rather not write, and catch errors you might have missed.

    The Prompt Engineering Philosophy

    Good prompt engineering isn’t about finding magic words that unlock AI potential. It’s about clear communication and precise requirements, skills that make you a better developer overall.

    The Specificity Principle: Vague prompts get vague results. Specific prompts get specific results.

    Markdown
    Vague: "Make this component better"
    Specific: "Optimize this React component by memoizing expensive calculations, adding proper error boundaries, and implementing loading states for async operations"

    The Iterative Improvement Loop

    Embrace the fact that AI development is a conversation, not a command sequence:

    1. Express intent clearly
    2. Review and test the output
    3. Provide specific feedback
    4. Iterate until satisfied

    This is how all good software development works, just at AI speed.

    The Real-World Implementation Guide

    Week 1: Foundation Setup

    • Choose your primary AI coding tool and set up proper context files
    • Create a simple project to practice basic patterns
    • Establish your documentation and workflow habits

    Week 2: Development Flow Mastery

    • Practice the test-driven AI workflow on real features
    • Experiment with conversation management strategies
    • Build your code review and quality control reflexes

    Week 3: Advanced Techniques

    • Try multi-instance development for complex features
    • Experiment with different tools for different tasks
    • Develop your debugging and problem-solving workflows

    Week 4: Scale and Optimize

    • Refactor and clean up your AI-generated codebase
    • Document your learned patterns and approaches
    • Share knowledge with your team

    AI Coding is Human Amplification

    To all the vibe coders out there: AI coding tools don’t replace good development practices, but they do make good practices more important.

    The developers thriving in this new landscape aren’t the ones with the best prompts or the latest tools. They’re the ones who understand software architecture, can communicate requirements clearly, and have developed the discipline to maintain quality at AI speed.

    Your AI assistant will happily generate 500 lines of code in 30 seconds. Whether that code is a masterpiece or a maintenance nightmare depends entirely on the human guiding the process.

    So here’s my challenge to you: Don’t just learn to use AI coding tools. Learn to direct them. Be the architect, let AI be the construction crew, and together you’ll build things that neither humans nor AI could create alone.

    The age of AI-assisted development isn’t coming—it’s here. The question isn’t whether you’ll use these tools, but whether you’ll master them before they become table stakes for every developer.

    Now stop reading guides and go build something amazing. Your AI assistant is waiting.

    Ready to Level Up Your AI Coding Game?

    This guide barely scratches the surface of what’s possible when you truly master AI-assisted development. Want to dive deeper into specific tools, advanced techniques, and real-world case studies?

    What’s your biggest AI coding challenge right now? Contact me and let’s solve it together. Whether you’re struggling with context management, debugging AI-generated code, or scaling your workflows, I’ve probably been there.

    And if this guide helped you level up your AI coding game, share it with a fellow developer who’s still fighting with their AI instead of collaborating with it.

    Want to build your own AI agents?

    Sign up for my newsletter covering everything from the tools, APIs, and frameworks you need, to building and serving your own multi-step AI agents.

  • Diving into Amp Code: A QuickStart Guide

    Diving into Amp Code: A QuickStart Guide

    I first tried out Amp Code a few months ago around the same time I started getting into Claude Code. Claude had just announced a feature where I could use my existing monthly subscription instead of paying for extra API costs, so I didn’t give Amp a fair shake.

    Over the last couple of weeks, I’ve been hearing more about Amp, and Claude Code has felt a bit… not-so-magical. So I decided to give it a real shot again, and I have to say, I am extremely impressed.

    In this guide, we’re going to cover what make Amp different, and how to get the most out of it. As someone who has used every vibe coding tool, app, agent, CLI, what have you, I’ve developed certain patterns for working with AI coding. I’ve covered these patterns many times before on my blog, so I’ll focus on just the Amp stuff in this one.

    installation and setup

    Amp has integrations with all IDEs but I prefer the CLI, so that’s what I’ll be using here. Install it globally, navigate to your project directory, and start running it.

    Bash
    npm install -g @sourcegraph/amp
    amp

    If you’re new to Amp, you’ll need to create an account and it should come with $10 in free credits (at least it did for me when I first signed up).

    Once that’s done, you’ll see this beautiful screen.

    As a quick aside, I have to say, I love the whole aesthetic of Amp. Their blog, their docs, even the way they write and communicate.

    Anyway, let’s dive right in.

    What Makes Amp Different

    Aside from the great vibes? For starters, Amp is model agnostic, which means you can use it with Claude Sonnet and Opus (if you’re coming from Claude Code) or GPT-5 and Gemini 2.5 Pro.

    Interestingly enough, you can’t change which model it uses under the hood (or maybe I haven’t found a way to do that). It picks the best model for the job, and defaults to Sonnet with a 1M token window. If it needs more horsepower it can switch to a model like (I think) o3 or GPT-5. You can also force it to do so by telling it to use “The Oracle”.

    The other cool feature is that it is collaborative-ish (more on this later). You can create a shared workspace for your teammates and every conversation that someone has gets synced to that workspace, so you can view it in your dashboard. This allows you to see how others are using it and what code changes they’re making.

    You can also link to a teammate’s conversation from your own to add context. This is useful if you’re taking over a feature from them.

    Setting up your project

    If you’re using Amp in an existing project, start by setting up an Agents.md file. This is the main context file that Amp looks for when you have a new conversation (aka Thread) with Amp.

    If you’ve used Claude Code or have read my tutorial on it, you’ll see it’s the same concept, except Claude Code looks for Claude.md. I suggest following the same patterns:

    • Have Amp generate the document for you by typing in /agent
    • For large codebases, create one general purpose Agents.md file that talks about the overall project and conventions, and multiple specific Agents.md file for each sub-project or sub-directory. Amp will automatically pulls those in when needed.
    • Use @ to mention other documentation files in your main Agents.md files.
    • Periodically update these files.

    If you’re in a brand new project, ask Amp to set up your project structure first and then create the Agents.md file.

    Working with amp

    After you’re done setting up, type in /new and start a new thread. Much like I describe in my Claude Code tutorial, we want to have numerous small and contained conversations with Amp to manage context and stay on task.

    Amp works exactly like any other coding agent. You give it a task, it reasons, then uses tools like Read to gather more information, then uses tools like Write to write code. It may go back and forth, reading, editing, using other tools, and when it’s done there’s a satisfying ping sound to let you know.

    If you’re working on a new feature, I suggest doing the following things:

    • Create a new git branch. Ask Amp to do so, or create a custom slash command (more on this later)
    • Start by planning. There’s no separate plan mode like Claude Code (which is too rigid anyway) so just ask Amp to plan first before writing code, or set up a custom slash command.
    • Once you have a detailed plan, ask it to commit this to a temporary file, and then have it pick off pieces in new threads.

    Amp also has a little todo feature as it keeps track of work within a thread.

    Tools

    Tool usage is what makes a coding agent come to life. Amp has a bunch of them built-in (your standard search, read, write, bash, etc.)

    You can also customize and extend them with MCPs and custom tools. I’ve already covered MCPs on my blog before so I won’t go into too much detail here. What you need to know:

    • Set up MCPs in the global Amp settings at ~/.config/amp/settings.json for MacOS
    • Don’t get too crazy with them, they fill up context window, so only use a handful of MCPs. In fact, only use MCPs if you don’t have a CLI option.

    The more interesting feature here is Toolboxes, to set up custom tools in Amp. This basically allows you to write custom scripts that Amp can call as tools.

    You first need to set an environment variable AMP_TOOLBOX that points to a directory containing your scripts.

    Bash
    # Create toolbox directory
    mkdir -p ~/.amp-tools
    export AMP_TOOLBOX=~/.amp-tools
    
    # Add to your shell profile for persistence
    echo 'export AMP_TOOLBOX=~/.amp-tools' >> ~/.bashrc

    For each script in this directory, you’ll need a function that describes the tool, and a function that executes the tool.

    When Amp starts, it scans this directory and automatically discovers your custom tools. It also runs their description functions (via TOOLBOX_ACTION) so that it knows what they’re capable of. That way, when it’s deciding which tool to use, it can look through the descriptions, pick a custom tool, and then run the function that executes it.

    Bash
    #!/bin/bash
    # ~/.amp-tools/check-dev-services
    
    if [ "$TOOLBOX_ACTION" = "describe" ]; then
        # Output description in key-value pairs, one per line
        echo "name: check-dev-services"
        echo "description: Check the status of local development services (database, Redis, API server)"
        echo "services: string comma-separated list of services to check (optional)"
        exit 0
    fi
    
    # This is the execute phase - do the actual work
    if [ "$TOOLBOX_ACTION" = "execute" ]; then
        echo "Checking local development services..."
        echo
    
        # Check database connection
        if pg_isready -h localhost -p 5432 >/dev/null 2>&1; then
            echo "✅ PostgreSQL: Running on port 5432"
        else
            echo "❌ PostgreSQL: Not running or not accessible"
        fi
    
        # Check Redis
        if redis-cli ping >/dev/null 2>&1; then
            echo "✅ Redis: Running and responding"
        else
            echo "❌ Redis: Not running or not accessible"
        fi
    
        # Check API server
        if curl -s http://localhost:3000/health >/dev/null; then
            echo "✅ API Server: Running on port 3000"
        else
            echo "❌ API Server: Not running on port 3000"
        fi
    
        echo
        echo "Development environment status check complete."
    fi

    Permissions

    Before Amp runs any tool or MCP, it needs your permission. You can create tool-level permissions in the settings or using the /permissions slash command, which Amp checks before executing a tool.

    As you can see here, you can get quite granular with the permissions. You can blanket allow or reject certain tools, or have it ask you for permissions each time it uses something. You can even delegate it to an external program.

    Subagents

    Amp can spawn subagents via the Task tool for complex tasks that benefit from independent execution. Each subagent has its own context window and access to tools like file editing and terminal commands.

    When Subagents Excel:

    • Multi-step tasks that can be broken into independent parts
    • Operations producing extensive output not needed after completion
    • Parallel work across different code areas
    • Keeping the main thread’s context clean

    Subagent Limitations:

    • They work in isolation and can’t communicate with each other
    • You can’t guide them mid-task
    • They start fresh without your conversation’s accumulated context

    While you can’t define a subagent in Amp, you can directly tell Amp to spawn a subagent while you’re working with it. Say there’s a bug and you don’t want to use up the context in your main thread, tell it to spawn a subagent to fix the bug.

    Slash Commands

    We’ve already covered a few slash commands but if you want to see the full list of available slash commands, just type in / and they’ll pop up. You can also type /help for more shortcuts.

    You can also define custom slash commands. Create a .agents/commands/ folder in your working directory and start defining them as plain text markdown files. This is where you can create the /plan command I mentioned earlier which is just an instruction to tell Amp you want to plan out a new feature and you don’t want to start coding just yet.

    Team Collaboration: Multiplayer Coding

    I mentioned this earlier so if you’re bringing a team onto your project, it’s worth setting up a workspace. Create this from the settings page at ampcode.com/settings.

    Workspaces provide:

    • Shared Thread Visibility: Workspace threads are visible to all workspace members by default
    • Pooled Billing: Usage is shared across all workspace members
    • Knowledge Sharing: There’s nothing like getting to see how the smartest people on your team are actually using coding agents
    • Leaderboards: Each workspace includes a leaderboard that tracks thread activity and contributions

    Joining Workspaces: To join a workspace, you need an invitation from an existing workspace member. Enterprise workspaces can enable SSO to automatically include workspace members.

    Thread Sharing Strategies

    Thread Visibility Options: Threads can be public (visible to anyone with the link), workspace-shared (visible to workspace members), or private (visible only to you).

    Best Practices for Thread Sharing:

    1. Feature Development: Share threads showing how you implemented complex features
    2. Problem Solving: Share debugging sessions that uncovered interesting solutions
    3. Learning Examples: Share threads that demonstrate effective prompting techniques
    4. Code Reviews: Include links to Amp threads when submitting code for review to provide context

    Final Words

    I haven’t really gone into how to prompt or work with Amp because I’ve covered it in detail previously as these are patterns that apply across all coding agents (document well, start with a plan, keep threads short, use git often, etc.).

    If you’re new to AI coding, I suggest you read my other guides to understand the patterns and then use this guide for Amp specific tips and tricks.

    And, of course, the best way to learn is to do it yourself, so just start using Amp in a project and go from there.

    If you have any questions, feel free to reach out!

    Want to build your own AI agents?

    Sign up for my newsletter covering everything from the tools, APIs, and frameworks you need, to building and serving your own multi-step AI agents.

  • Building a Deep Research Agent with LangGraph And Exa

    Building a Deep Research Agent with LangGraph And Exa

    I was talking to a VC fund recently about their investment process. Part of their due diligence is doing thorough and deep research about the market, competition, even the founders, for every startup pitch they receive.

    They use OpenAI’s Deep Research for the core research (Claude and Gemini have these features too) but there’s still a lot of manual work to give it the right context, guide the research, incorporate their previous research and data, and edit the final output to match their memo formats.

    They wanted a way to integrate it into their workflow and automate the process. and that’s why they approached me.

    It turns out there’s no magic to OpenAI’s Deep Research features. It’s all about solid Agent Design Principles.

    And since I recently wrote a tutorial on how to build a coding agent, I figured I’d do one for Deep Research!

    In this tutorial, you’ll learn how to create a Deep Research Agent, similar to OpenAI’s using LangGraph.

    Why Roll Your Own Deep Research?

    As I mentioned, OpenAI, Claude, and Gemini all have their own Deep Research product. They’re good for general purpose usage but when you get into specific enterprise workflows or domains like law, finance, etc., there are other factors to think about:

    1. Customization & Control: You may want control over which sources are trusted, how evidence is weighed, what gets excluded. You may also want to add your own heuristics, reasoning loops, and custom output styles.
    2. Source Transparency & Auditability: You may need to choose and log sources and also store evidence trails for compliance, legal defensibility, or investor reporting.
    3. Data Privacy & Security: You may want to keep sensitive queries inside your environment, or use your own private data sources to enrich the research.
    4. Workflow Integration: Instead of copying and pasting to a web app, you can embed your own research agent in your existing workflow and trigger it automatically via an API call.
    5. Scale and Extensibility: Finally, rolling your own means you can use open source models to reduce costs at scale, and also extend it into your broader agent stack and other types of work.

    I actually think there’s a pretty big market for custom deep research agents, much like we have a massive custom RAG market.

    Think about how many companies spend billions of dollars on McKinsey and the like for market research. Corporations will cut those $10M retainers if an in-house DeepResearch agent produces 80% of the same work.

    Why LangGraph?

    We could just code this in pure Python but I wanted to use an agent framework to abstract away some of the context management stuff. And since I’ve already explored other frameworks on this blog, like Google’s ADK, I figured I’d give LangGraph a shot.

    LangGraph works a bit different to other frameworks in that it lets us model any workflow as a state machine where data flows through specialized nodes, each one handling one aspect of the workflow.

    This gives us some important advantages:

    • State management made simple. Every step in our deep research pipeline passes along and updates a shared state object. This makes it easy to debug and extend.
    • Graph-based execution. Instead of linear scripts, LangGraph lets you build an explicit directed graph of nodes and edges. That means you can retry, skip, or expand nodes later without rewriting your whole pipeline.
    • Reliability and observability. Built-in support for retries, checkpoints, and inspection makes it easier to trust your agent when it runs for minutes and touches dozens of APIs.
    • Future-proofing. When you want to expand from a linear flow to something collaborative, you can do it by just adding nodes and edges to the graph.

    Understanding the Research Pipeline

    To keep this simple, our deep research agent will follow a linear pipeline that mirrors a basic research workflow. So it’s not really an “agent”, because it follows a pre-defined flow, but I’ll explain how you can make it more agentic later.

    Think about how you research a complex topic manually:

    1. You start by breaking down the big question into smaller, focused questions
    2. You search for information on each sub-topic
    3. You collect and read through multiple sources
    4. You evaluate which information is most reliable and relevant
    5. You synthesize everything into a coherent narrative

    Our agent will work the same way:

    Markdown
    Research Question → Planner → Searcher → Fetcher → Ranker → Writer → Final Report
    

    Each node has a specific responsibility:

    Planner Node: Takes your research question and breaks it into 3-7 focused sub-questions. Also generates optimized search queries for each sub-question. If your question is vague, it asks clarifying questions first.

    Searcher Node: Uses the Exa API to find relevant web sources for each search query. Smart enough to filter out low-quality sources and prioritize recent content for time-sensitive queries.

    Fetcher Node: Downloads web pages and extracts clean, readable text. Handles modern JavaScript-heavy websites using Crawl4AI, removes navigation menus and ads, and splits content into manageable passages.

    Ranker Node: Takes all the text passages and ranks them by relevance to the original research question. Uses neural reranking with Cohere to find the most valuable information.

    Writer Node: Takes all the information and compiles it into a comprehensive executive report with proper citations, executive summary, and strategic insights.

    Setting Up the Foundation

    Aside from LangGraph, we’re using a few other tools to build out our app:

    • Exa: Exa is awesome for a deep research agent because of it’s AI-optimized search API that understands semantic meaning rather than just keywords.
    • Crawl4AI: This is a free library for web scraping and handles modern JavaScript-heavy websites that traditional scrapers can’t process
    • GPT-4o: We’re going to be using GPT-4o as our main model for planning our search and writing the final report. You can use GPT-5 but it’s overkill.
    • Cohere: Finally, we use Cohere to provide specialized neural reranking to identify the most relevant content that we get back from our searches.

    Feel free to switch out any of these tools for something else. That’s the beauty of rolling your own deep research.

    Designing the Data Models

    As I mentioned earlier, LangGraph models a workflow as a state machine. So we need to start with data models that define the shared state that flows through the workflow.

    Think of this state as a growing research folder that each node adds to – the planner adds sub-questions, the searcher adds sources, the fetcher adds content, and so on.

    The most important model is `ResearchState`, which acts as our central data container:

    Python
    # src/deep_research/models/core.py
    class ResearchState(BaseModel):
        # Input
        research_question: Optional[ResearchQuestion] = None
    
        # Intermediate states
        sub_questions: List[SubQuestion] = Field(default_factory=list)
        search_queries: List[str] = Field(default_factory=list)
        sources: List[Source] = Field(default_factory=list)
    
        # Final output
        research_report: Optional[ResearchReport] = None
    
        # Processing metadata
        status: ResearchStatus = ResearchStatus.PENDING
        current_step: str = "initialized"
        error_message: Optional[str] = None
        processing_stats: Dict[str, Any] = Field(default_factory=dict)

    This state object starts with just a research question and gradually accumulates data as it moves through the pipeline. Each field represents a different stage of processing – from the initial question to sub-questions, then sources, and finally a complete report.

    We also need supporting models for individual data types like `ResearchQuestion` (the input), `Source` (web pages we find), `Passage` (chunks of text from those pages), and `ResearchReport` (the final output). Each uses Pydantic for validation and includes metadata like timestamps and confidence scores.

    The implementation follows the same pattern as `ResearchState` with proper field validation and default values.

    Building the LangGraph Workflow

    Now let’s build the core workflow that orchestrates our research pipeline. This means defining a state graph where each node can modify shared state and edges determine the flow between nodes.

    Here’s how we set up our workflow structure:

    Python
    # Create the state graph
    workflow = StateGraph(ResearchState)
    
    # Add our six research nodes
    workflow.add_node("planner", planner_node)
    workflow.add_node("searcher", searcher_node) 
    workflow.add_node("fetcher", fetcher_node)
    workflow.add_node("ranker", ranker_node)
    workflow.add_node("writer", writer_node)
    
    # Define the linear flow
    workflow.set_entry_point("planner")
    workflow.add_edge("planner", "searcher")
    workflow.add_edge("searcher", "fetcher") 
    workflow.add_edge("fetcher", "ranker")
    workflow.add_edge("ranker", "writer")
    workflow.add_edge("writer", END)
    
    # Compile into executable graph
    graph = workflow.compile()
    

    The LangGraph workflow orchestrates our research pipeline. Think of it as the conductor of an orchestra – it knows which instrument (node) should play when and ensures they all work together harmoniously.

    The workflow class does three main things:

    • Graph Construction: Creates a LangGraph StateGraph and connects our six nodes in sequence.
    • Node Wrapping: Each node gets wrapped with error handling and progress reporting.
    • Execution Management: Runs the graph and handles any failures gracefully.

    Want to build your own AI agents?

    Sign up for my newsletter covering everything from the tools, APIs, and frameworks you need, to building and serving your own multi-step AI agents.

    Implementing the Research Nodes

    Now let’s build each node in our research pipeline. I’ll show you the key concepts and implementation strategies for each one, focusing on the interesting architectural decisions.

    Node 1: The Planner – Breaking Down Complex Questions

    The planner is the strategist of our system. It takes a potentially vague research question and transforms it into a structured research plan:

    Context Clarification: If someone asks “What’s happening with AI?”, that’s too broad to research effectively. The planner detects this and generates clarifying questions:

    • “Are you interested in recent AI breakthroughs, business developments, or regulatory changes?”
    • “What’s your intended use case – research, investment, or staying informed?”
    • “Any specific AI domains of interest (like generative AI, robotics, or safety)?”

    Question Decomposition: Once it has enough context, it breaks the main question into 3-7 focused sub-questions. For “latest AI safety developments,” it might generate:

    1. “What are the most recent AI safety research papers and findings from 2025?”
    2. “What regulatory developments in AI safety have occurred recently?”
    3. “What are the latest industry initiatives and standards for AI safety?”
    Python
    class PlannerNode:
        async def plan(self, state: ResearchState) -> ResearchState:
            self._report_progress("Analyzing research question", "planning")
            
            # Generate sub-questions
            sub_questions = await self._decompose_question(state.research_question)
            state.sub_questions = sub_questions
            
            self._report_progress(f"Generated {len(sub_questions)} sub-questions", "planning")
            return state
            
        async def decompose_question(self, state: ResearchState) -> ResearchState:
            current_date = datetime.now().strftime("%B %Y")  # "August 2025"
            
            system_prompt = f"""You are a research planning expert. 
            Current date: {current_date}
            
            Decompose this research question into 3-7 focused sub-questions that together 
            will comprehensively answer the main question. If the question asks for 
            "latest" or "recent" information, focus on finding up-to-date content."""
            
            response = await self.llm.ainvoke([system_prompt, user_question])
            # ... parsing logic to create SubQuestion objects
    

    Node 2: The Searcher – Finding Relevant Sources

    The searcher takes our optimized queries and finds relevant web sources. It uses the Exa API, which is specifically designed for AI applications and provides semantic search capabilities beyond traditional keyword matching.

    The Exa API also allows us to customize our searches:

    • Source type detection: Automatically categorizes sources as academic papers, news articles, blog posts, etc.
    • Quality filtering: Filters out low-quality sources and duplicate content
    • Temporal prioritization: For time-sensitive queries, prioritizes recent sources
    • Domain filtering: Can focus on specific domains if specified
    Python
    class SearcherNode:
        def __init__(self, exa_api_key: str, max_sources_per_query: int = 10):
            self.exa = Exa(api_key=exa_api_key)
            self.max_sources_per_query = max_sources_per_query
        
        async def search_for_subquestion(self, subquestion: SubQuestion) -> List[Source]:
            results = []
            for query in subquestion.search_queries:
                # Use Exa's semantic search with temporal filtering
                search_results = await self.exa.search(
                    query=query,
                    num_results=self.max_sources_per_query,
                    include_domains=["gov", "edu", "arxiv.org"],  # Prioritize authoritative sources
                    start_published_date="2025-01-01"  # Recent content for temporal queries
                )
                # Convert Exa results to our Source objects

    Node 3: The Fetcher – Extracting Clean Content

    The fetcher downloads web pages and extracts clean, readable text. This is more complex than it sounds because modern websites are full of navigation menus, ads, cookie banners, and JavaScript-generated content.

    I normally use Firecrawl but I wanted to explore a free and open-source package for this project.

    We’ll use Crawl4AI because it handles JavaScript-heavy sites and provides intelligent content extraction. It can distinguish between main content and page chrome (navigation, sidebars, etc.).

    Python
    class FetcherNode(AsyncContextNode):
         async def fetch(self, state: ResearchState) -> ResearchState:
            self._report_progress("Starting content extraction", "fetching")
            
            all_passages = []
            for source in state.sources:
                try:
                    # Extract clean content using Crawl4AI
                    result = await self.crawler.arun(
                        url=str(source.url),
                        word_count_threshold=10,
                        exclude_tags=['nav', 'footer', 'aside', 'header'],
                        remove_overlay_elements=True,
                    )
                    
                    if result.success and result.markdown:
                        # Split content into manageable passages
                        passages = self._split_into_passages(result.markdown, source.id)
                        all_passages.extend(passages)
                except Exception:
                    continue  # Skip failed sources
            
            state.passages = all_passages
            return state

    Node 4: The Ranker – Finding the Most Relevant Information

    After fetching, we might have hundreds of articles. The ranker’s job is to identify the most relevant ones for our research question.

    We first cut up all the articles into overlapping passages. We then pass all those passages into Cohere’s reranking API and re-rank them against the original queries. We can then take the first x% of passages and pass them on to the next node.

    By doing it this way, we eliminate a lot of the fluff that many articles tend to have and extract only the meat.

    Python
    class RankerNode(NodeBase):
        async def rerank_with_cohere(self, passages: List[Passage], query_text: str) -> List[Passage]:
            """Optionally rerank passages using Cohere's rerank API."""
            if not self.cohere_client or not passages:
                return passages
    
            try:
                # Prepare documents for reranking
                documents = [p.content for p in passages]
    
                # Use Cohere rerank
                rerank_response = self.cohere_client.rerank(
                    model="rerank-english-v3.0",
                    query=query_text,
                    documents=documents,
                    top_n=min(len(documents), self.rerank_top_k),
                    return_documents=False,
                )
    
                # Reorder passages based on Cohere ranking
                reranked_passages = []
                for result in rerank_response.results:
                    if result.index < len(passages):
                        passage = passages[result.index]
                        passage.rerank_score = result.relevance_score
                        reranked_passages.append(passage)
    
                return reranked_passages
    
            except Exception as e:
                print(f"Cohere reranking failed: {e}")
                # Fallback: return original passages
                return passages

    Node 6: The Writer – Synthesizing the Final Report

    The writer takes all the information and compiles it into a comprehensive executive report. It’s optimized for strategic decision-making with executive summaries, clear findings, and proper citations.

    At the simplest level we just need to pass the original query and all the passages to an LLM (I’m using GPT-4o in this example but any LLM should do) and have it turn that into a research report.

    This node is mostly prompt engineering.

    Python
    async def generate_research_content(self, state: ResearchState
        ) -> tuple[str, List[ExecutiveSummaryPoint]]:
            # Build context about sources  
        recent_sources = len(
            [
                s
                for s in sources_with_content
                if s.publication_date
                and (datetime.now() - s.publication_date).days < 180
            ]
        )
        source_context = f"Based on analysis of {len(sources_with_content)} sources ({recent_sources} recent)."
    
        system_prompt = """You are a research analyst writing a comprehensive, readable research report from web sources.
            
    Your task:
    1. Analyze the provided source content and synthesize key insights
    2. Create a natural, flowing report that reads well
    3. Organize information logically with clear sections and headings
    4. Write in an engaging, accessible style suitable for executives
    5. Include proper citations using [Source: URL] format
    6. Identify key themes, trends, and important findings
    7. Note any contradictions or conflicting information
    
    IMPORTANT: Structure your response as follows:
    ---EXECUTIVE_SUMMARY---
    [Write 3-5 concise bullet points that capture the key insights from your research]
    
    ---FULL_REPORT---
    [Write the detailed research report with proper sections, analysis, and citations]
    
    This format allows me to extract both the executive summary and full report from your response."""
    
            # Prepare source content for the LLM
        source_texts = []
        for i, source in enumerate(sources_with_content, 1):
            # Truncate very long content to fit in context window
            content = source.content or ""
            if len(content) > 8000:  # Reasonable limit per source
                content = content[:8000] + "...[truncated]"
                
            source_info = f"Source {i}: {source.title or 'Untitled'}\nURL: {source.url}\n"
            if source.publication_date:
                source_info += f"Published: {source.publication_date.strftime('%Y-%m-%d')}\n"
            source_info += f"Content:\n{content}\n"
            source_texts.append(source_info)
            
        sources_text = "\n---\n".join(source_texts)
    
        research_question = state.research_question
        if not research_question:
            return "No research question provided.", []
    
        human_prompt = f"""Research Question: {research_question.question}
    
    Context: {research_question.context or 'General research inquiry'}
    
    {source_context}
    
    Source Materials:
    {sources_text}
    
    Please write a comprehensive, well-structured research report that analyzes these sources and answers the research question:"""
    
        try:
            messages = [
                SystemMessage(content=system_prompt),
                HumanMessage(content=human_prompt),
            ]
    
            response = await self.llm.ainvoke(messages)
            if isinstance(response.content, str):
                content = response.content.strip()
            else:
                content = str(response.content).strip()
    
            # Parse the structured response
            return self._parse_llm_response(content)
    
        except Exception as e:
            print(f"Research content generation failed: {e}")
            return "Unable to generate research content at this time.", []

    The final output

    Here’s what it looks like when everything comes together. If you have a look at the full source code on my GitHub, you’ll see that I’ve added in a CLI, but you could trigger this from any other workflow.

    Python
    # Install and setup
    pip install -e .
    export OPENAI_API_KEY="your-key"
    export EXA_API_KEY="your-key"
    
    # Run a research query
    deep-research research "What are the latest developments in open source LLMs?"
    

    When you run this command, here’s what happens behind the scenes:

    1. Context Analysis: The planner analyzes your question. If it’s vague, it presents clarifying questions:
      • “Are you interested in recent breakthroughs, regulatory developments, or industry initiatives?”
      • “What’s your intended use case – research, investment, or staying informed?”
    2. Research Planning: Based on your answers, it generates focused sub-questions:
      • “What are the most recent open source AI research papers and findings from 2025?”
      • “What developments in open source AI have occurred recently?”
    3. Intelligent Search: For each sub-question, it executes multiple searches using Exa’s semantic search, finding 50-100 relevant sources.
    4. Content Extraction: Downloads and extracts clean text from all sources using Crawl4AI, handling JavaScript and filtering out navigation/ads.
    5. Relevance Ranking: Ranks hundreds of text passages to find the most valuable information.
    6. Report Generation: Synthesizes everything into a comprehensive executive report with strategic insights.

    Next Steps

    As I said at the start, this is a simple linear workflow and not really an agent.

    To make it more agentic, we can redesign the system around a reasoning model, with each node being a tool it can use, and a ReAct loop.

    The cool thing about LangGraph is that, since we’ve already defined our tools (individual nodes) we don’t really need to change much. We simply change the graph from a linear one to a hub-and-spoke model.

    So instead of one node leading to the next, we have a central LLM node, and it has two-way connections to other nodes. We send our request to the central LLM node, and it decides what tools it wants, and in which order. It can call tools multiple times, and it can also respond back to the user to check-in or clarify the direction, before executing more tool calls.

    This system is much more powerful because the user and the LLM can change directions during the research process as new information comes in. In the example above, let’s say we pick up on the Vicuna model and also GPT-OSS. We may determine that since GPT-OSS is a trending topic that we should focus on that direction, and drop Vicuna.

    Similarly if we’re not satisfied with the final report, we may go back and forth with our LLM to run a few more queries, verify a source, or fine tune the structure.

    And if we want to add new tools, like a source verification tool, we simply define a new node, and add a two way connection to our central node.

    Conclusion

    By combining LangGraph’s workflow capabilities with specialized APIs like Exa and Crawl4AI, we created a system that automates the research process from question to comprehensive report.

    While the big AI labs have built impressive research products, you now have the blueprint to build something equally powerful (and more customized) for your specific needs.

  • Build a Coding Agent from Scratch: The Complete Python Tutorial

    Build a Coding Agent from Scratch: The Complete Python Tutorial

    I have been a heavy user of Claude Code since it came out (and recently Amp Code). As someone who builds agents for a living, I’ve always wondered what makes it so good.

    So I decided to try and reverse engineer it.

    It turns out building a coding agent is surprisingly straightforward once you understand the core concepts. You don’t need a PhD in machine learning or years of AI research experience. You don’t even need an agent framework.

    Over the course of this tutorial, we’re going to build a baby Claude Code (Baby Code for short) using nothing but Python. It won’t be nearly as good as the real thing, but you will have a real, working agent that can:

    • Read and understand codebases
    • Execute code safely in a sandboxed environment
    • Iterate on solutions based on test results and error feedback
    • Handle multi-step coding tasks
    • Debug itself when things go wrong

    So grab your favorite terminal, fire up your Python environment, and let’s build something awesome.

    Understanding Coding Agents: Core Concepts

    Before we dive into implementation details, let’s take a step back and define what a “coding agent” actually is.

    An agent is a system that perceives its environment, makes decisions based on those perceptions, and takes actions to achieve goals.

    In our case, the environment is a codebase, the perceptions come from reading files and executing code, and the actions are things like creating files, running tests, or modifying existing code.

    What makes coding agents particularly interesting is that they operate in a domain that’s already highly structured and rule-based. Code either works or it doesn’t. Tests pass or fail. Syntax is valid or invalid. This binary feedback creates excellent training signals for iterative improvement.

    The ReAct Pattern: How Agents Actually Think

    Most agents today follow a pattern called ReAct (Reason, Act, Observe). Here’s how it works in practice:

    Reason: The agent analyzes the current situation and plans its next step. “I need to understand this codebase. Let me start by looking at the main entry point and understanding the project structure.”

    Act: The agent takes a concrete action based on its reasoning. It might read a file, execute a command, or write some code.

    Observe: The agent examines the results of its action and incorporates that feedback into its understanding.

    Then the cycle repeats. Reason → Act → Observe → Reason → Act → Observe.

    It’s similar to how humans solve problems. When you’re debugging a complex issue, you don’t just stare at the code hoping for divine inspiration. You form a hypothesis (reason), test it by adding a print statement or running a specific test (act), look at the results (observe), and then refine your understanding based on what you learned.

    The Four Pillars of Our Coding Agent

    Every effective AI agent needs four core components – The brain, the tools, the instructions, and the memory or context.

    I’ll skim over the details here but I’ve explained more in my guide to designing AI agents.

    1. The brain is the core LLM that does the reasoning and code gen. Reasoning models like Claude Sonnet, Gemini 2.5 Pro, and OpenAI’s o-series or GPT-5 are recommended. In this tutorial we use Claude Sonnet.
    2. The instructions are the core system prompt you give to the LLM when you initialize it. Read about prompt engineering to learn more.
    3. The tools are the concrete actions your agent can take in the world. Reading files, writing code, executing commands, running tests – basically anything a human developer can do through their keyboard.
    4. Memory is the data your agent works with. For coding agents, we need a context management system that allows your agent to work with large codebases by intelligently selecting the most relevant information for each task.

    For coding agents specifically, I’d add that we need an execution sandbox. Your agent will be writing and executing code, potentially on your production machine. Without proper sandboxing, you’re essentially giving a very enthusiastic and tireless intern root access to your system.

    PS: You can get the full code for this and a bunch of other stuff in my workbook below.

    The Agent Architecture We’re Building

    I want to show you the complete blueprint before we start coding, because understanding the overall architecture will make every individual component make sense as we implement it.

    Here’s our roadmap:

    Phase 1: Minimal Viable Agent – Get the core ReAct loop working with basic file operations. By the end of this phase, you’ll have an agent that can read files, understand simple tasks, and reason through solutions step by step.

    Phase 2: Safe Code Execution Engine – Add the ability to generate and execute code safely. This is where we implement AST-based validation and process sandboxing. Your agent will be able to write Python code, test it, and iterate based on the results.

    Phase 3: Context Management for Large Codebases – Scale beyond toy examples to real projects. We’ll implement search and intelligent context retrieval so your agent can work with codebases containing hundreds of files.

    Each phase builds on the previous one, and you’ll have working software at every step.

    Phase 1: Minimum Viable Agent

    We’re going to do this all in one file and 300 lines of code. Just create a folder in your computer and in it create a file called agent.py

    Step 1: Setup our 4 pillars

    Remember, the four pillars of an agent are the brain (or the model), the instructions (system prompt), the tools, and memory.

    Let’s start with instructions. Here’s my system prompt, feel free to tweak it as needed:

    Python
    SYSTEM_PROMPT = """You are a helpful coding assistant that can read, write, and manage files.
    
    You have access to the following tools:
    - read_file: Read the contents of a file
    - write_file: Write content to a file (creates or overwrites)
    - list_files: List files in a directory
    
    When given a task:
    1. Think about what you need to do
    2. Use tools to gather information or make changes
    3. Continue until the task is complete
    4. Explain what you did
    
    Always be careful when writing files - make sure you understand the existing content first."""

    Current gen models have a tool use ability and you just need to send it a schema up front so that when it’s reasoning it can look at the tool list and decide if it needs one to help with it’s task.

    We define it like this:

    Python
    TOOLS = [
        {
            "name": "read_file",
            "description": "Read the contents of a file at the given path. Returns the file content as a string.",
            "input_schema": {
                "type": "object",
                "properties": {
                    "path": {
                        "type": "string",
                        "description": "The path to the file to read"
                    }
                },
                "required": ["path"]
            }
        },
          { # Other tool definitions follow a similar pattern
            }
    ]

    Let’s also define our actual tool logic. Here’s what it would look like for the Read File tool:

    Python
    def read_file(path: str) -> str:
        """Read and return the contents of a file."""
        try:
            with open(path, 'r') as f:
                return f.read()
        except FileNotFoundError:
            return f"Error: File not found: {path}"
        except PermissionError:
            return f"Error: Permission denied: {path}"
        except Exception as e:
            return f"Error reading file: {e}"

    Continue defining the rest of the tools that way and add them to the tools schema. You can look at the full code in my GitHub Repository for help.

    I have implemented read, write, and list, but you can add more for an extra challenge.

    We’ll also need a function to execute the tool that we call if our LLM responds with a tool use request.

    Python
    def execute_tool(tool_name: str, tool_input: dict) -> str:
        """Execute a tool and return its result."""
        try:
            if tool_name == "read_file":
                return read_file(tool_input["path"])
            elif tool_name == "write_file":
                return write_file(tool_input["path"], tool_input["content"])
            elif tool_name == "list_files":
                return list_files(tool_input.get("path", "."))
            else:
                return f"Error: Unknown tool: {tool_name}"
        except Exception as e:
            return f"Error executing {tool_name}: {e}"

    For our brain, we’ll use Sonnet 4 but any reasoning model will do. And for our memory, it’s going to be a basic conversation history. We’ll see what this looks like in the next section.

    Step 2: Build the ReAct Loop

    With our four pillars ready, we need to guide our model to follow the ReAct pattern. This block of code is where all the magic happens:

    Python
    def run_agent(user_message: str, conversation_history: list = None) -> None:
        """
        Run the agent with a user message, streaming the response.
    
        This implements the ReAct (Reason, Act, Observe) loop:
        1. Send message to Claude (streaming)
        2. If Claude wants to use a tool, execute it and continue
        3. Repeat until Claude gives a final response
        """
        if conversation_history is None:
            conversation_history = []
    
        # Add the user's message to the conversation
        conversation_history.append({
            "role": "user",
            "content": user_message
        })
    
        # ReAct loop - keep going until the model stops using tools
        while True:
            # Collect the full response while streaming
            assistant_content = []
            current_text = ""
            current_tool_use = None
    
            # Stream the response
            with client.messages.stream(
                model="claude-sonnet-4-20250514",
                max_tokens=4096,
                system=SYSTEM_PROMPT,
                tools=TOOLS,
                messages=conversation_history
            ) as stream:
                for event in stream:
                    # Handle different event types
                    if event.type == "content_block_start":
                        if event.content_block.type == "text":
                            current_text = ""
                        elif event.content_block.type == "tool_use":
                            current_tool_use = {
                                "type": "tool_use",
                                "id": event.content_block.id,
                                "name": event.content_block.name,
                                "input": {}
                            }
                            # Show real-time feedback when a tool use starts
                            print(f"\n  → Using tool: {current_tool_use['name']}")
                            sys.stdout.flush()
    
                    elif event.type == "content_block_delta":
                        if event.delta.type == "text_delta":
                            # Stream text to stdout immediately
                            sys.stdout.write(event.delta.text)
                            sys.stdout.flush()
                            current_text += event.delta.text
                        elif event.delta.type == "input_json_delta":
                            # Accumulate tool input JSON
                            pass  # We'll get the full input from the final message
    
                    elif event.type == "content_block_stop":
                        if current_text:
                            assistant_content.append({
                                "type": "text",
                                "text": current_text
                            })
                            current_text = ""
                        elif current_tool_use:
                            # Tool use block completed
                            current_tool_use = None
    
                # Get the final message to extract complete tool uses
                final_message = stream.get_final_message()
    
            # Use the content from the final message (has complete tool inputs)
            conversation_history.append({
                "role": "assistant",
                "content": final_message.content
            })
    
            # Check if there are any tool uses
            tool_uses = [block for block in final_message.content if block.type == "tool_use"]
    
            if tool_uses:
                # Process each tool use
                tool_results = []
                for block in tool_uses:
                    result = execute_tool(block.name, block.input)
    
                    tool_results.append({
                        "type": "tool_result",
                        "tool_use_id": block.id,
                        "content": result
                    })
    
                # Add tool results to the conversation
                conversation_history.append({
                    "role": "user",
                    "content": tool_results
                })
                # Continue loop to get Claude's next response
    
            else:
                # No tool uses - we're done
                print()  # Final newline after streamed content
                return

    Yes, it really is just a while loop. We call Claude with our request and it answers. If it needs to use a tool, we process the tool (as defined before) and then send back the tool result.

    And then we loop.

    When there are no more tool calls, we assume it’s done and print the final response.

    We’re also streaming Claude’s responses for readability so that we can print it to our terminal and see what’s happening.

    Let’s Test it out!

    Our agent is ready to use. We’re at 300 lines of code, but that includes the comments, error handling, and helper functions for verbosity. Our core agent code is ~200 lines. Let’s see if it’s any good!

    Let’s add a main function to our code so that we can get that CLI interface:

    Python
    def main():
        """Main chat loop."""
        print("=" * 60)
        print("Baby Code Phase 1: Minimum Viable Coding Agent")
        print("=" * 60)
        print("Commands: 'quit' to exit, 'clear' to reset conversation")
        print("=" * 60)
        print()
    
        conversation_history = []
    
        while True:
            try:
                user_input = input("You: ").strip()
            except (EOFError, KeyboardInterrupt):
                print("\nGoodbye!")
                break
    
            if not user_input:
                continue
    
            if user_input.lower() == 'quit':
                print("Goodbye!")
                break
    
            if user_input.lower() == 'clear':
                conversation_history = []
                print("Conversation cleared.\n")
                continue
    
            print("\nAgent: ", end="", flush=True)
            run_agent(user_input, conversation_history)
            print()
    
    
    if __name__ == "__main__":
        main()

    Now run the file and watch your own baby Claude Code come to life!

    Understanding the Code Flow

    If you’ve been following along, you should have a working coding agent. It’s basic but it gets the job done.

    We first pass your task to the run_agent method, which compiles a conversation history and calls Claude.

    Based on our system prompt and tool schema, Claude decides if it needs to use a tool to answer our request. If so, it sends back a tool request which we execute. We add the results to our message history and send it back to Claude, and loop over.

    We keep doing this until there are no more tool calls, in which case we assume Claude has nothing else to do and we return the final answer.

    Et voila! We have a functioning coding agent that can explain codebases, write new code, and keep track of a conversation.

    Pretty sweet.

    I’ve added all the code to my Github. Enter your email below to receive it.

    Phase 2: Adding Code Execution

    We have a coding agent that can read and write code, but in this age of vibe coding, we want it to be able to text and execute code as well. Those bugs ain’t gonna debug themselves.

    All we need to do is give it new tools to execute code. The main complexity is ensuring it doesn’t run malicious code or delete our OS by mistake. That’s why this phase is mostly about code validation and sandboxing. Let’s see how.

    Step 1: Code Refactoring

    Before we do anything, let’s refactor our existing code for better readability and modularity.

    Here’s our new project structure:

    Python
    coding_agent/
    ├── agent.py           # Main agent
    ├── executor.py        # Sandboxed Code executor
    ├── tools.py           # Tool definitions
    ├── validator.py       # AST-based validator

    Most of the code is pretty much the same. Agent.py is the core agent loop sans the tools setup, which go into a tools.py file.

    We’re going to add two new tools: `run_python` for sandboxed Python execution, and `run_bash` for shell commands.

    The run bash tool is a subprocess with a timeout:

    Python
    def run_bash(command: str) -> str:
        try:
            result = subprocess.run(
                command,
                shell=True,
                capture_output=True,
                text=True,
                timeout=60,
                cwd=os.getcwd()
            )
    
            output = result.stdout
            if result.stderr:
                output += "\n--- stderr ---\n" + result.stderr
    
            if len(output) > 10000:
                output = output[:10000] + "\n... (output truncated)"
    
            if result.returncode == 0:
                return output if output else "(no output)"
            else:
                return f"Command failed (exit code {result.returncode}):\n{output}"
    
        except subprocess.TimeoutExpired:
            return "Error: Command timed out after 60 seconds"

    This lets Claude run `npm install`, `pytest`, `git status`, or any other shell command. The 60-second timeout prevents runaway processes.

    Step 2: The Validator

    The validator uses Python’s Abstract Syntax Tree (AST) to analyze code before it runs. Think of it as a security guard that inspects code at the gate.

    Before any code runs, we parse it and look for dangerous patterns:

    Python
    BLOCKED_MODULES = {
        "os", "subprocess", "sys", "shutil",
        "socket", "requests", "urllib",
        "pathlib", "io", "builtins",
        "importlib", "ctypes", "multiprocessing"
    }
    
    BLOCKED_BUILTINS = {
        "exec", "eval", "compile",
        "open", "input", "__import__",
        "getattr", "setattr", "delattr",
        "globals", "locals", "vars"
    }
    
    class SafetyValidator(ast.NodeVisitor):
        def __init__(self):
            self.errors = []
    
        def visit_Import(self, node):
            for alias in node.names:
                module = alias.name.split('.')[0]
                if module in BLOCKED_MODULES:
                    self.errors.append(f"Blocked import: '{alias.name}'")
            self.generic_visit(node)
    
        def visit_ImportFrom(self, node):
            if node.module:
                module = node.module.split('.')[0]
                if module in BLOCKED_MODULES:
                    self.errors.append(f"Blocked import: 'from {node.module}'")
            self.generic_visit(node)
    
        def visit_Call(self, node):
            if isinstance(node.func, ast.Name):
                if node.func.id in BLOCKED_BUILTINS:
                    self.errors.append(f"Blocked function: '{node.func.id}()'")
            self.generic_visit(node)

    What the Validator Blocks:

    1. Dangerous Imports
    Python
    import os  # BLOCKED - could delete files
    import subprocess  # BLOCKED - could run shell commands
    import socket  # BLOCKED - could make network connections

    2. File Operations

    Python
    open('file.txt', 'w')  # BLOCKED - could overwrite files
    with open('/etc/passwd', 'r'):  # BLOCKED - could read sensitive files

    3. Dangerous Built-in Functions

    Python
    eval("malicious_code")  # BLOCKED - arbitrary code execution
    exec("import os; os.system('rm -rf /')")  # BLOCKED
    __import__('os')  # BLOCKED - dynamic imports

    4. System Access Attempts

    Python
    sys.exit()  # BLOCKED - could crash the program
    os.environ['SECRET_KEY']  # BLOCKED - environment access

    The validator works by walking the AST and checking each node type:

    • ast.Import and ast.ImportFrom nodes → check against dangerous modules
    • ast.Call nodes → check for dangerous function calls
    • ast.Attribute nodes → check for dangerous attribute access

    Most coding agents don’t actually block all of this. They have a permissioning system to give their users control. I’m just being overly cautious for the sake of this tutorial.

    Step 3: The Executor

    Even if code passes validation, we still need runtime protection. Again, I’m being overly cautious here and creating a separate sub-process to run code:

    Python
    def execute_code(code: str) -> Tuple[bool, str]:
        # Validate first
        is_safe, errors = validate_code(code)
        if not is_safe:
            return False, "Validation failed:\n" + "\n".join(errors)
    
        # Write to temp file
        with tempfile.NamedTemporaryFile(mode='w', suffix='.py', delete=False) as f:
            f.write(code)
            temp_path = f.name
    
        try:
            result = subprocess.run(
                ['python3', temp_path],
                capture_output=True,
                text=True,
                timeout=10,
                env={
                    'PATH': os.environ.get('PATH', '/usr/bin:/bin'),
                    'HOME': '/tmp',
                }
            )
            output = result.stdout + result.stderr
            return result.returncode == 0, output
    
        except subprocess.TimeoutExpired:
            return False, "Timeout: Code took too long to execute"
        finally:
            os.unlink(temp_path)

    How It All Works Together

    Adding code execution transforms our agent from a simple file manipulator into a true coding assistant that can:

    • Learn from execution results to improve its suggestions
    • Write and immediately test solutions
    • Debug by seeing actual error messages
    • Iterate on solutions that don’t work
    • Validate that code produces expected output

    Here’s the complete flow when the agent executes code:

    Python
    User Request: "Test this fibonacci function"
    
    1. Agent calls execute_code tool
    
    2. CodeValidator.validate(code)
        ├─ Parse to AST
        ├─ Check for dangerous imports ✓
        ├─ Check for dangerous functions ✓
        └─ Check for file operations ✓
    
    3. CodeExecutor.execute(code)
        ├─ Create sandboxed code file
        ├─ Apply restricted builtins
        ├─ Set resource limits
        ├─ Run in subprocess
        ├─ Monitor with timeout
        └─ Capture output safely
    
    4. Return results to agent
        ├─ stdout: "Fibonacci(10) = 55"
        ├─ stderr: ""
        └─ success: true

    And that’s Phase 2! If you’ve been implementing with me, you should be getting results like this:

    Phase 3: Better Context management

    Phases 1 and 2 gave our agent powerful capabilities: it can manipulate files and safely execute code. But try asking it to “refactor the authentication system” in a real project with 500 files, and it hits a wall. The agent doesn’t know:

    • What files are relevant to authentication
    • How components connect across the codebase
    • Which functions call which others
    • What context it needs to make safe changes

    This is the fundamental challenge of AI coding assistants: context. LLMs have a limited context window, and even if we could fit an entire codebase, indiscriminately dumping hundreds of files would be wasteful and confusing. The agent would spend most of its reasoning power just figuring out what’s relevant.

    Now, context engineering is an entire topic on its own, and the way Claude Code does it is different than how Amp Code does it which is different than FactoryAI and so on. This is a large reason why they each behave differently.

    For our Baby Code agent, we’re not going to implement anything close to what they’ve done as it’s a large undertaking. However, I do want to show you that even small upgrades to our existing structure can dramatically improve outcomes.

    Adding Smart Search

    First, instead of having our agent read every file, we allow it to search for specific functions, as determined by the model when it reasons.

    Python
    def search_files(path: str, pattern: str, file_pattern: str = None) -> str:
        results = []
        for file_path in Path(path).rglob("*"):
            if not file_path.is_file():
                continue
    
            # Skip noise
            if any(part in ['node_modules', '__pycache__', '.git', 'venv']
                   for part in file_path.parts):
                continue
    
            # Filter by file pattern if specified
            if file_pattern and not fnmatch.fnmatch(file_path.name, file_pattern):
                continue
    
            try:
                with open(file_path, 'r') as f:
                    for i, line in enumerate(f, 1):
                        if pattern.lower() in line.lower():
                            display = line.rstrip()[:200]  # Truncate long lines
                            results.append(f"{file_path}:{i}: {display}")
                            if len(results) >= 50:
                                return '\n'.join(results) + "\n... (limited to 50 results)"
            except (UnicodeDecodeError, PermissionError):
                continue
    
        return '\n'.join(results) if results else f"No matches for '{pattern}'"

    Now Claude can find that function in one call: `search_files(pattern=”def calculate_tax”)`. The results include file paths and line numbers, so it knows exactly where to look.

    Edit, Don’t Rewrite

    Our Phase 1 `write_file` tool overwrites the entire file. That works, but it’s:

    • Error-prone (easy to accidentally delete something)
    • Expensive (sending huge files back and forth burns tokens)
    • Slow (more tokens = more latency)

    For existing files, surgical edits are better:

    Python
    def edit_file(path: str, old_string: str, new_string: str) -> str:
        with open(path, 'r') as f:
            content = f.read()
    
        if old_string not in content:
            return f"Error: Could not find the specified text in {path}"
    
        if content.count(old_string) > 1:
            return f"Error: Found {content.count(old_string)} occurrences. Be more specific."
    
        new_content = content.replace(old_string, new_string, 1)
    
        with open(path, 'w') as f:
            f.write(new_content)
    
        return f"Successfully edited {path}"

    The constraint that `old_string` must appear exactly once is intentional. It forces Claude to include enough context to uniquely identify the location. Without this, you’d get edits in the wrong place when the same code pattern appears multiple times.

    Handle large files gracefully

    We always read files before editing them. However, instead of reading the whole file, we want to read chunks of it and focus on the parts that matter.

    Python
    MAX_LINES = 500
    
    def read_file(path: str, offset: int = None, limit: int = None) -> str:
        with open(path, 'r') as f:
            lines = f.readlines()
    
        total = len(lines)
        start = (offset - 1) if offset else 0
        end = min(start + (limit or MAX_LINES), total)
    
        # Add line numbers
        result = '\n'.join(f"{i:4} | {line.rstrip()}"
                           for i, line in enumerate(lines[start:end], start + 1))
    
        if end < total:
            result += f"\n\n[Showing lines {start+1}-{end} of {total} total]"
            result += f"\nUse read_file with offset={end+1} to see more."
    
        return result

    Going Further: Real Context Management

    As I said, we aren’t implementing a production-grade context management system here. But if you want to do that, here are some patterns that Claude Code and others use:

    Pattern 1: Memory files

    The simplest and most effective technique is persistent memory, a file that gets loaded into every conversation automatically.

    Claude Code uses `CLAUDE.md` files for this, other agents use AGENTS.md. You put one in your project root, and it gets injected into the system prompt. Here’s what that looks like:

    Python
    def build_system_prompt():
        base_prompt = """You are an expert coding assistant..."""
    
        # Load project memory if it exists
        memory_file = Path("CLAUDE.md")
        if memory_file.exists():
            project_context = memory_file.read_text()
            return base_prompt + f"\n\n## Project Context\n\n{project_context}"
    
        return base_prompt

    What goes in this file? Everything Claude needs to know before it starts exploring:

    Python
    # Project: E-commerce API
    
    ## Architecture
    - FastAPI backend in `/src/api`
    - PostgreSQL database, models in `/src/models`
    - React frontend in `/frontend` (separate repo)
    
    ## Conventions
    - Use Pydantic for all request/response models
    - All endpoints require authentication except /health
    - Tests go in `/tests`, mirror the src structure
    
    ## Current Focus
    - Migrating from REST to GraphQL
    - Don't modify the legacy /v1 endpoints

    This is surprisingly powerful. Instead of Claude spending 5 turns figuring out your project structure, it knows immediately. Instead of guessing at conventions, it follows them from the start.

    Pattern 2: Semantic Search with Embeddings

    Text search (`search_files`) finds exact matches. But what if you want to find “code that handles user authentication” or “functions similar to this one”?

    That’s where embeddings come in. You convert code into vectors that capture semantic meaning, store them in a vector database, and search by similarity rather than keywords.

    Here’s the conceptual flow:

    Python
    # Indexing (done once, updated incrementally)
    def index_codebase(directory: str):
        chunks = []
        for file_path in Path(directory).rglob("*.py"):
            content = file_path.read_text()
            # Split into meaningful chunks (functions, classes)
            for chunk in split_into_chunks(content):
                embedding = get_embedding(chunk.text)
                chunks.append({
                    "path": file_path,
                    "text": chunk.text,
                    "embedding": embedding,
                    "start_line": chunk.start_line
                })
    
        # Store in vector database
        vector_db.insert(chunks)
    
    # Retrieval (done per query)
    def semantic_search(query: str, top_k: int = 10):
        query_embedding = get_embedding(query)
        results = vector_db.search(query_embedding, limit=top_k)
        return results

    The magic is in how you chunk the code. Naive approaches split by lines or characters, but that breaks semantic units. Better approaches use AST parsing to split by functions, classes, or logical blocks:

    Python
    def split_into_chunks(code: str) -> List[CodeChunk]:
        tree = ast.parse(code)
        chunks = []
    
        for node in ast.walk(tree):
            if isinstance(node, (ast.FunctionDef, ast.ClassDef)):
                chunk_text = ast.get_source_segment(code, node)
                chunks.append(CodeChunk(
                    text=chunk_text,
                    start_line=node.lineno,
                    type=type(node).__name__
                ))
    
        return chunks

    Now instead of `search_files(pattern=”authentication”)`, your agent can do `semantic_search(query=”user login and session handling”)` and find relevant code even if it doesn’t contain the word “authentication”.

    Pattern 3: Intelligent Context Selection

    The most sophisticated approach is automatic context selection. The agent figures out what’s relevant without being asked.

    When you say “fix the bug in the checkout flow”, a smart agent would:

    1. Search for “checkout” to find entry points
    2. Trace imports and function calls to find related code
    3. Look at recent git changes to that area
    4. Pull in relevant tests
    5. Check for related documentation

    All of this happens before the LLM even starts reasoning about the fix.

    Here’s a simplified version:

    Python
    def gather_context(task: str, codebase_path: str) -> str:
        context_parts = []
    
        # 1. Find directly relevant files
        search_results = search_files(codebase_path, extract_keywords(task))
        relevant_files = extract_file_paths(search_results)
    
        # 2. Trace dependencies
        for file_path in relevant_files[:5]:  # Limit to avoid explosion
            imports = extract_imports(file_path)
            for imp in imports:
                if is_local_import(imp, codebase_path):
                    relevant_files.append(resolve_import(imp))
    
        # 3. Find related tests
        for file_path in relevant_files:
            test_file = find_test_file(file_path)
            if test_file:
                relevant_files.append(test_file)
    
        # 4. Read and concatenate
        for file_path in deduplicate(relevant_files)[:10]:
            content = read_file(file_path)
            context_parts.append(f"### {file_path}\n```\n{content}\n```")
    
        return "\n\n".join(context_parts)

    Pattern 4: Context Compaction

    Long conversations accumulate cruft (old file reads, superseded attempts, irrelevant tangents). At some point, this noise hurts more than it helps.

    Context compaction periodically summarizes and compresses the conversation history:

    Python
    def compact_context(conversation_history: list) -> list:
        if count_tokens(conversation_history) < COMPACTION_THRESHOLD:
            return conversation_history
    
        # Keep the most recent turns intact
        recent = conversation_history[-6:]
        old = conversation_history[:-6]
    
        # Summarize older turns
        summary_prompt = """Summarize the following conversation, focusing on:
        - What task was being worked on
        - Key decisions made
        - Current state of any files modified
        - Any errors encountered and how they were resolved
        """
    
        summary = llm.summarize(old, summary_prompt)
    
        # Replace old turns with summary
        return [{"role": "system", "content": f"Previous context:\n{summary}"}] + recent

    This is especially important for long-running sessions. Without compaction, you’ll eventually hit the context limit and lose the ability to continue.

    Putting it together

    Production coding agents combine multiple strategies for context management:

    Python
    ┌─────────────────────────────────────────────────────────┐
    │                    User Request                          │
    └─────────────────────────────────────────────────────────┘
    
    
    ┌─────────────────────────────────────────────────────────┐
    1. Load Memory (CLAUDE.md)                  │
    │    Persistent project knowledge loaded into prompt       │
    └─────────────────────────────────────────────────────────┘
    
    
    ┌─────────────────────────────────────────────────────────┐
    2. Gather Context (before LLM call)            │
    │    Semantic search + dependency tracing + tests          │
    └─────────────────────────────────────────────────────────┘
    
    
    ┌─────────────────────────────────────────────────────────┐
    3. ReAct Loop                          │
    LLM reasons and acts with curated context             │
    └─────────────────────────────────────────────────────────┘
    
    
    ┌─────────────────────────────────────────────────────────┐
    4. Compact (if needed)                        │
    │    Summarize old context to make room for new            │
    └─────────────────────────────────────────────────────────┘

    Our Phase 3 agent only does step 3. That’s enough to be useful, but it’s why Claude Code and others feel so much more capable on large projects. They’re doing all four steps.

    What We’ve Built

    If you’ve made it this far and implemented everything, congratulations! You now have a real working agent. Across three phases, we’ve built:

    Python
    | Phase | What We Added | Lines of Code |
    |-------|---------------|---------------|
    | 1 | ReAct loop, file tools, streaming | ~200 |
    | 2 | Python sandbox, bash execution | ~350 |
    | 3 | Search, edit_file, pagination | ~400 |

    That’s a functional coding agent in about 400 lines of Python. It can:

    • Navigate and understand codebases
    • Read and edit files surgically
    • Run code and shell commands
    • Iterate on errors autonomously
    • Stream responses in real-time

    I tested out our Phase 3 agent by asking it to generate a personal finance tracking app. It built a fully functioning product in one shot with multiple files.

    Initially, it didn’t have the Charts section. After it was done I asked it to add it in and it didn’t need to read every single file. Instead, it was able to pinpoint where exactly it needed to insert the chart component and added it the app flawlessly.

    The full code is on my GitHub (enter your email in the form below to get the link) and organized into three phases, each self-contained and runnable:

    Python
    baby-code/
    ├── phase1-minimum-viable/
    │   └── agent.py           # ReAct loop + file tools
    
    ├── phase2-code-execution/
    │   ├── agent.py           # Main agent
    │   ├── tools.py           # Tool definitions
    │   ├── validator.py       # AST safety checker
    │   └── executor.py        # Python sandbox
    
    ├── phase3-context-management/
    │   ├── agent.py           # Main agent
    │   ├── tools.py           # Extended tools
    │   ├── validator.py       # Same as Phase 2
    │   └── executor.py        # Same as Phase 2

    Each phase builds on the previous one. The structure stays consistent but `tools.py` just gets more functions, and `agent.py` gets an updated system prompt.

    Clone it, run it, break it, improve it. That’s the best way to learn.

    And if you build something cool with it, let me know. I’d love to see what you create.

  • Genie 3 And the Future of AI Generated Video

    Genie 3 And the Future of AI Generated Video

    Do you remember that Will Smith eating Spaghetti video that was generated by AI. The first one in 2023, despite its glitchiness, was fascinating to see. A simple text prompt resulting in something that could possibly be a video.

    Two years later we have Sora’s mesmerizing 60-second clips and Veo 3’s photorealistic sequences. We have passed the Will Smith test. It looks like an actual movie scene of him eating spaghetti.

    But this week, Google announced something that blew me away.

    Imaging stepping into an AI-generated world that responds to your presence, remembers your actions, and evolves based on your choices. For the first time in this entire AI revolution, we won’t be consuming content, we will be experiencing it.

    I’m talking about Genie 3, an AI that doesn’t just generate video, it generates entire interactive 3D environments you can explore for minutes.

    It’s text to… virtual world? Interactive video? You can say something like create a beautiful lake surrounded by trees with mountains in the background, and Genie 3 will generate that but also allow you to move around in that environment like you’re a video game character.

    You’re probably going, well we already have that with video games and VR. No, what I’m talking about is something completely different. It’s not a pre-built world. Everything is generated on the fly.

    And in this blog post, I’m going to explain to you why that’s amazing, and how this technology can change the way we experience media.

    How Genie 3 Actually Works

    Understanding the technical breakthrough helps explain why this represents such a fundamental shift, and why the opportunities are so extraordinary.

    Traditional video generation works like this: you give it a prompt, it generates a complete video sequence, and you watch it passively.

    Genie 3 works fundamentally differently. Instead of generating complete video sequences, it generates the world one frame at a time, in response to your actions. Each new frame considers:

    • The entire history of what you’ve done in that world
    • Where you are currently located
    • What action you just took (moving forward, turning left, jumping)
    • Any new text prompts you’ve given (“make it rain,” “add a friendly robot”)

    This is like having a movie director who creates each scene in real-time based on where you decide to walk and what you ask to see.

    Memory Architecture: How It Remembers Your Journey

    The most impressive technical breakthrough is Genie 3’s memory system. It maintains visual memory extending up to one minute back in time. This means when you explore a forest, walk to a meadow, then decide to return to the forest, the system remembers:

    • Where trees were positioned
    • What the lighting looked like
    • Any objects you might have interacted with
    • The exact path you took to get there

    Real-Time Processing: The 720p at 24fps Challenge

    Genie 3 generates 720p resolution at 24 frames per second while processing user input in real-time. 

    To put that in perspective, traditional AI video generation might take 10-30 seconds to create a 10-second clip. Genie 3 is creating 24 unique images every second, each one considering your movement, the world’s history, and maintaining perfect consistency.

    This real-time capability is what enables actual user engagement rather than passive viewing. You can explore at your own pace, focus on what interests you, and have genuinely interactive experiences.

    Emergent 3D Understanding Without 3D Models

    Here’s where Genie 3 gets genuinely mind-bending from a technical perspective: it creates perfectly navigable 3D environments without using any explicit 3D models or representations.

    Traditional 3D graphics work by creating mathematical models of three-dimensional spaces, defining where every wall, tree, and rock exists in 3D coordinates. Genie 3 learned to understand 3D space by watching millions of hours of 2D video and figuring out the patterns of how 3D worlds appear when viewed from different angles.

    This approach means unlimited variety. Instead of being constrained to pre-built 3D environments, you can create any space imaginable through text description. Ancient Rome, futuristic cities, underwater kingdoms, all equally feasible and equally detailed.

    Dynamic Environment Modification: Promptable Physics

    One of Genie 3’s most impressive capabilities is real-time environment modification. While you’re exploring a world, you can give it new text prompts:

    • “Make it rain” adds realistic precipitation with water physics
    • “Add a sunset” changes the entire lighting system
    • “Spawn a friendly robot” introduces new interactive characters
    • “Turn this into a snowy winter scene” transforms the entire environment

    Imagine virtual showrooms where customers can say “show me this in blue” or “what would this look like in my living room?” and see real-time modifications. Product demonstrations that adapt instantly to customer interests.

    What This Technical Foundation Enables

    Understanding these technical capabilities helps explain why Genie 3 opens such extraordinary business opportunities:

    • Unlimited Content Variety: No pre-built environments means any conceivable space can be created and explored.
    • True Personalization: Each user’s journey through a virtual space is unique and memorable.
    • Engagement Depth: Users spend minutes or hours exploring rather than seconds consuming.
    • Dynamic Adaptation: Experiences can be modified in real-time based on user interests and behavior.
    • Scalable Experiences: Once created, virtual worlds can serve unlimited users simultaneously.

    The companies that understand and leverage these capabilities first will likely define how their entire industries approach customer experience, training, and engagement for the next decade.

    Let’s explore what this would look like in various industries.

    Gaming Industry Disruption: The End of Traditional Development?

    Modern AAA game development economics are insane. A single major title like Call of Duty, Grand Theft Auto, or The Last of Us, now routinely costs $100-200 million to develop. Not market. Develop. Marketing is another $50-100 million.

    Where does that money go? About 60-70% goes to content creation: environmental artists crafting every building, texture artists perfecting every surface, level designers hand-placing every interactive element. Teams of 20-30 artists might spend two years creating environments for a single game.

    Now imagine: a single developer sits down with Genie 3 and describes a game concept. “Create a post-apocalyptic city environment with dynamic weather, interactive buildings, and hidden underground areas.”

    Six hours later, they’re walking through a fully explorable world that would have taken that team of 20-30 artists two years to create.

    Don’t like the layout? Generate five alternatives and playtest them by lunch. Want different art styles? Create variations and see which resonates with early users.

    Based on industry conversations and technology trajectory analysis, I see four ways this transformation unfolds:

    Scenario 1: The Enhanced Studio Model 

    Major studios adopt AI world generation as powerful development tools while maintaining traditional structures. Environmental art teams become AI prompt engineers and world curators. Development timelines compress from five years to two. Budgets drop from $150 million to $50 million while quality increases.

    Scenario 2: The Indie Renaissance 

    Individual creators and small teams use AI world generation to compete directly with major studios. Quality gaps disappear while development costs become negligible. The gaming market fractures into thousands of niche experiences rather than dozens of blockbusters.

    Scenario 3: The Platform Revolution

    New companies emerge as “interactive world Netflix”, platforms where users create, share, and monetize AI-generated gaming experiences. Traditional game companies become either content creators for these platforms or risk irrelevance.

    Scenario 4: The Hybrid Evolution 

    The most likely scenario: a combination of all three. Major studios use AI for rapid prototyping while maintaining creative control. Indies flourish in niche markets. Platform companies provide infrastructure. Different approaches coexist and serve different market segments.

    Education Revolution: From Textbooks to Time Machines

    The global education market processes roughly $6 trillion annually across K-12, higher education, corporate training, and professional development. Despite spending trillions annually, we’re facing the worst engagement crisis in educational history.

    Student engagement has been declining for two decades. Corporate training completion rates hover around 30%. Higher education institutions struggle with retention. K-12 systems grapple with attention span challenges that make traditional instruction increasingly ineffective.

    Interactive AI world generation doesn’t just make education more engaging, it makes previously impossible forms of learning accessible and economical.

    Medical students can practice surgical procedures in AI-generated operating rooms that adapt to their skill level. Engineering students can test design concepts in virtual environments simulating real-world physics. Business students can manage companies in AI-generated market conditions that respond dynamically to strategic decisions.

    Instead of learning about subjects, students learn through direct engagement. Instead of memorizing information for tests, they develop competencies through repeated practice in realistic environments.

    The Metaverse Foundation: Building the Infrastructure of Virtual Worlds

    Remember the metaverse hype of 2021? Meta’s $10 billion investment.

    The first-generation metaverse promised digital worlds where we’d work, play, and socialize. What it delivered were expensive, empty virtual spaces requiring specialized hardware that felt more like tech demos than improvements over existing digital experiences.

    The fundamental problem wasn’t the vision, it was economics. Creating compelling virtual environments required massive investments. A single high-quality metaverse space could cost $500,000 to $1 million, required teams of specialized 3D artists, and took months to complete.

    With technologies like Genie 3, that problem completely disappears. Need a virtual conference room for your team meeting? Generated instantly with exactly the features you need. Want to explore ancient Egypt with historically accurate details? Created on demand with correct architectural features and cultural context.

    The Platform Layer: Companies providing computational infrastructure and AI capabilities for real-time world generation. This is the “AWS for virtual worlds” opportunity.

    The Experience Layer: Companies creating curated, purposeful journeys through AI-generated worlds rather than just providing raw world generation technology.

    The Commerce Layer: Dynamic, personalized commerce experiences where virtual goods can be generated on demand based on user preferences and context.

    The Social Layer: Communities around shared exploration and creation, where social connections come from shared discovery rather than just communication.

    The current metaverse market is valued at approximately $65 billion, with projections showing growth to $800 billion by 2030. But those projections assumed content creation costs would remain prohibitively expensive and virtual experiences would require specialized hardware.

    Interactive AI world generation changes those assumptions. If creating virtual experiences costs 90% less while quality and personalization increase dramatically, the addressable market expands far beyond traditional metaverse applications.

    Consider adjacent markets that become accessible: the $200 billion gaming industry, the $150 billion social media market, the $5 trillion global e-commerce market where virtual try-before-you-buy becomes economically feasible for any product category.

    Content Creation Revolution: The Creator Economy 2.0

    The global creator economy is valued at approximately $104 billion and growing rapidly. Over 50 million people worldwide consider themselves content creators. By every traditional metric, the creator economy is thriving.

    But beneath those numbers lies an increasingly unsustainable system. The average content creator works 50+ hours per week for median annual earnings under $40,000. The top 1% captures disproportionate revenue while the vast majority struggle with inconsistent income and constant pressure to produce more content faster.

    Interactive AI world generation fundamentally changes what content creation means and how creators build audience relationships.

    Traditional content creation follows a production-consumption cycle: creators produce content, audiences consume it, then creators must immediately produce more.

    Interactive worlds create an exploration-collaboration cycle: creators build spaces for discovery, audiences explore and contribute to those spaces, and spaces evolve based on community engagement.

    Instead of needing three posts per day, creators update and expand virtual spaces based on community interests. Instead of competing for 30 seconds of attention, they create destinations where people choose to spend meaningful time.

    I see four new categories of creators that might come out of this:

    World Architects: Creators specializing in designing virtual environments that other creators and communities can use and modify. They’re the “WordPress theme developers” of interactive worlds.

    Experience Directors: Curators of narrative paths and interactive journeys through AI-generated worlds. Part tour guide, part storyteller, part community manager.

    Interactive Storytellers: Creators of branching narratives that audiences explore through choices, investigations, and collaborative discovery.

    Community Builders: Creators focusing on facilitating social experiences within virtual worlds, designing spaces and activities that foster genuine connections between community members.

    Stepping Into Tomorrow’s Interactive Reality

    If yo’ve come this far, you might be thinking, “Relax Sid! It’s just a demo. Nothing is going to change just yet.”

    To which I say, think about this. Two years ago we had the first demos of AI-generated video and they looked like the Will Smith video. Most people didn’t take it seriously.

    The companies and content creators that did are reaping the benefits today. They’re making millions create content with AI, and saving costs on creative work.

    Now apply the same rate of improvement to Genie 3. A few years from now, creating immersive, explorable environments will be as straightforward as creating presentations today. Students will expect learning through exploration. Remote teams will collaborate in virtual spaces designed for their project requirements. Entertainment will mean participating in stories rather than watching them unfold.

    You could ignore it like you did with AI-video, or you could prepare.

    For Business Leaders: Identify specific use cases where interactive AI worlds provide 10x improvements over current approaches. Start with pilot programs demonstrating ROI while building organizational capabilities.

    For Educators and Content Creators: Begin experimenting with available interactive AI tools today. The learning curve for designing engaging virtual experiences is steep, early experimentation provides advantages that become difficult to achieve as the field becomes competitive.

    For Investors and Entrepreneurs: Focus on teams with domain expertise in specific applications rather than generic platforms. Look for evidence of user engagement depth rather than just adoption numbers.

    For Industry Veterans: Your expertise becomes more valuable when combined with AI world generation capabilities, not less. The architects who understand spatial design, educators who know how learning works, entertainment professionals who create engaging narratives, your knowledge provides platforms for applying expertise at unprecedented scale.

    The future is waiting to be explored. The only question remaining is whether you’ll be doing the exploring or reading about it in someone else’s case study.

    Welcome to the interactive revolution. The worlds are ready when you are.

  • A Guide to Context Engineering: Setting Agents Up for Success

    A Guide to Context Engineering: Setting Agents Up for Success

    There’s been a lot of talk about context engineering recently and at first glance it sounds like just another Silicon Valley buzzword. We had prompt engineering which sounded like a fancy way of telling an AI what it should do, and now context engineering which sounds like an even fancier way of saying prompt engineering.

    But it’s more than that. In my guide on how to design AI agents, I mentioned that some of the core components are Instructions, Tools, and Memory.

    Instructions here are the prompt you give to the LLM where you tell it what it should do, how it should behave, and so on. This is where prompt engineering comes in handy.

    But a truly autonomous agent needs more than just a set of instructions. Think about when you hire a human, let’s say an executive assistant. Your instructions to them might be to answer emails, manage your calendar, and maybe even guidelines on how to handle communications.

    But the assistant needs more than just that. If someone sends you an email asking to meet, the assistant needs to know who that is, what your history is with that person, and whether it’s worth your time meeting with them, before responding.

    They need context.

    The same principle applies to building autonomous agents. We need to dynamically supply the right context to our agent so that it may determine the best path forward. And we do this using Tools and Memory.

    In this guide, we look at how it works, various tools and frameworks to build context systems, and some real world examples.

    Choosing The Right Context

    Let’s go back to the assistant analogy. To answer that email, they need context about that specific sender and your relationship with them. So the context here isn’t about all your contacts, it’s about that specific one.

    And that’s what context engineering is all about – building a system that can dynamically select the right context and feed it to our agents in the right format so that it has all the information it needs to successfully complete its task.

    In fact, one may argue that missing context is one of the biggest reasons agentic systems fail. The context either doesn’t exist as data, or it isn’t being pulled in when needed.

    Conversely, building a strong context management system is the key to a successful agent.

    But hang on, why don’t we just give the agent all the information we have up front? Why do we need to select context?

    Primarily because of token limitations. Just because you have a window of 1 million tokens (I’m looking at you, Gemini) doesn’t mean you should use it all. A typical enterprise knowledge base containing millions of documents would require tens of millions of tokens to include comprehensively, far exceeding any practical context window.

    Additionally, LLMs suffer from “lost in the middle” effects where relevant information buried within extensive context receives inadequate attention. Models consistently perform better when critical information appears at the beginning or end of context windows.

    Google’s “Chain of Agents” research found that systems using selective context outperformed full-context approaches by 10% while using significantly fewer tokens. Industry implementations consistently show 35-60% improvements in accuracy and response speed when using curated top-k document retrieval compared to comprehensive knowledge base access.

    The anatomy of a context management system

    Ok so we’ve established how context engineering is different than prompt engineering, and why we need a system instead of stuffing all the context into our window. Let’s look at the principles and components that make up this system.

    Strategic Design Principles

    Dynamic context construction is the foundation of effective systems. Instead of using static templates or fixed information sets, we build context actively for each interaction. This means analyzing the specific task, like in our AI assistant example, and using the tools and data at hand to select optimal context combinations in real-time.

    Information relevance trumps information volume in every successful implementation. For example, recent communications with our email sender matters more than an email thread from 5 years ago. You’ll need to take into account factors like this when building your system.

    Token efficiency drives every design decision in production systems, due to the aforementioned context window limitations. This means choosing information formats that convey maximum meaning in minimum space, eliminating redundancy, and prioritizing information density over comprehensiveness.

    Technical Architecture Components

    Context systems are built from six essential components that work together to provide comprehensive information environments.

    System prompts establish the behavioral foundation, defining the AI’s role, capabilities, and constraints. These remain relatively stable but can be adapted based on task types or user contexts.

    Memory systems provide continuity across interactions, maintaining both immediate conversation history and long-term learned information. Short-term memory tracks recent exchanges, while long-term memory preserves facts, preferences, and patterns that persist across sessions.

    Retrieval systems dynamically incorporate external knowledge through RAG implementations that search, rank, and integrate relevant information from knowledge bases, documents, or real-time data sources.

    Tool integrations expand capabilities beyond text processing, providing access to APIs, databases, calculation engines, and external services that enable the AI to perform actions and gather fresh information.

    User input processing transforms raw queries into structured task specifications that guide context assembly and response generation.

    Output formatting ensures responses meet specific requirements for structure, format, and processability by downstream systems.

    Common pitfalls and how to avoid them

    Context poisoning represents the most dangerous failure mode in context engineering systems. This occurs when errors or hallucinations enter the context and are repeatedly referenced, creating compounding mistakes over time. Prevention requires implementing context validation mechanisms, periodic cleaning processes, and explicit error detection systems. Recovery strategies include context quarantine systems and automated fact-checking against reliable sources.

    Context distraction happens when excessive information causes models to lose focus on primary tasks. This manifests as off-topic responses or irrelevant information inclusion. Set up filtering and scoring systems that prioritize task-relevant information to avoid this.

    Context confusion emerges when you have contradictory or poorly organized information. This happens often in systems with multiple sources of information and results in inconsistent outputs, logical contradictions, or inappropriate tone/style variations. Create clear information hierarchies and conflict resolution algorithms to identify and resolve contradictory information sources.

    Tools and frameworks powering modern context engineering

    LangChain and LangGraph provide comprehensive frameworks for agent orchestration and context management. LangChain offers context engineering primitives including memory management, tool integration, and retrieval systems.

    LangGraph extends these capabilities with workflow orchestration, state management, and complex reasoning chains. Both frameworks support thread-scoped short-term memory, long-term memory persistence, and context compression utilities.

    LlamaIndex specializes in data frameworks for knowledge-intensive applications. Its architecture supports advanced document parsing, multi-modal indexing, and context-aware chat engines. Memory implementations include VectorMemoryBlock for vector database storage, FactExtractionMemoryBlock for automatic fact extraction, and StaticMemoryBlock for persistent information.

    Anthropic’s Model Context Protocol (MCP) has emerged as the industry standard for context integration. Released in November 2024, MCP provides an open-source protocol for connecting AI systems to data sources, tools, and external services. The protocol standardizes how AI systems access and utilize external information sources.

    Specialized tools address specific context engineering challenges. RAGAS provides real-time context quality evaluation. LangSmith offers agent tracing and observability for debugging context flows. Promptfoo enables systematic testing of context and prompt combinations. These tools are essential for maintaining and optimizing context engineering systems in production environments.

    Real World Example – AI Coding Agents

    AI Coding agents are a great example of how context engineering can dramatically impact the behaviour of an agent. We already know that LLMs have reached a point where they are incredibly good at writing or debugging code.

    The reason an agent like Claude Code or Amp Code feels like magic is its ability to pull in the right context. It has a three-layer context management system that goes far beyond simple prompt engineering. This architecture enables them to understand not just individual files, but entire project ecosystems with their dependencies, conventions, and architectural patterns.

    When you initialize Claude Code in a new project, it first scans the entire codebase to understand project organization, identifying key files like package.json, requirements.txt, or build configuration files that reveal the project’s technology stack and dependencies.

    It then creates a Claude.md file that serve as a persistent memory system and provides project-specific context to the AI. It contains project conventions, architectural decisions, coding standards, and any special considerations. For example, a Claude.md file might specify: “This project uses functional React components only, follows conventional commit format, and requires all database queries to use the existing ORM patterns.”

    We then have a dynamic layer that manages real-time information gathering and context assembly for specific tasks. When you ask Claude Code to “fix the authentication bug,” it doesn’t just look at files with “auth” in the name, it analyzes the codebase to understand authentication flow, identifies related middleware, configuration files, and test files that might be relevant.

    Once it pulls in this context, it creates a plan to fix the bug and presents it to the user. Now we have the final layer of context, which is the conversation. This includes what the user says to the agent, as well as the tools the agent uses and the data it gets back.

    When it executes shell commands, reads file contents, or integrates with GitHub APIs, the results become part of the context that informs future decisions. This creates a feedback loop where action results improve subsequent reasoning.

    Claude also has some nifty ways of managing when context gets too large like compacting a conversation (which includes all the results from tool calls).

    Context Is All You Need

    Like I said earlier, most failure modes in agents can be traced back to faulty context management. This is especially true in coding agents where the wrong context can lead to disastrous outcomes but the right context leads to vibe coding bliss.

    As you design your systems, start simple, giving your agent limited context and enabling it to pick the most pertinent, and slowly scale up from there, adding more memory and tools to augment the context.

    Want to build your own AI agents?

    Sign up for my newsletter covering everything from the tools, APIs, and frameworks you need, to building and serving your own multi-step AI agents.

  • Cooking with Claude Code: The Complete Guide

    Cooking with Claude Code: The Complete Guide

    Updated for November 2025

    I first wrote this guide on July 4, 2025 (freedom!) but Anthropic has since shipped more features than Trump has shipped tariffs, so I’ve updated it.

    Ah yes, another Claude Code convert. Welcome. We have much to discuss.

    Claude Code is a CLI (Command Line Interface) that uses Anthropic’s latest models, Sonnet 4.5 and Opus 4.5, to generate code for you. You give it instructions in your terminal, and the built-in coding agent with its tools executes those commands.

    If you’ve tried Codex by OpenAI or Jules by Google, it’s kinda like that, but man is it good. Like really, really good.

    I myself am (or was) a Cursor user for the longest time. And then I tried Claude Code when it came out and haven’t looked back.

    In this tutorial, we’re going to learn how to use it by building a complete personal finance tracker web app. Along the way, I’ll introduce you to all the features, usage patterns, and tips and tricks to getting the most out of it. Follow along for best results.

    If you’re a visual learner, here’s a video –

    What Makes Claude Code Different

    Hello Claude my old friend, I’ve come to code with you again.

    There are tons of other coding agents on the market already, and they all have the same agentic capabilities – they understand codebases, write and edit code, run commands, manage git operations, and coordinate multiple parallel development streams.

    But what makes Claude Code different?

    To understand this, it helps to understand how a coding agent works. It’s surprisingly straightforward and I won’t go into detail here but you should read my tutorial on how to build a baby Claude Code from scratch to get an intuition of it.

    Once you read that, you’ll realize that Claude’s strength comes from its context management and tool calls.

    In fact, you’ll realize that Claude Code is actually a really well-designed general purpose agent that happens to be good at following a plan and coding.

    How Claude Codes

    When you’re working on a big feature, it starts with a plan and creates a Todo list. In the most recent update, it creates a temporary plan.md file for longer builds. This helps it stay on track and maintains context for the whole session.

    It then starts knocking off the tasks one by one, calling tools to read code, update it, or even create entire new files from scratch.

    The cool part is how it recursively does this, writing a new file, then remembering it needs to update another file to import the new one, and so on.

    And when it’s done with an item on the todo, it checks it off and moves to the next.

    Another things that really impressed me is how proactive it is. For example, if you tell it to remove a hard-coded value in one file, it proactively looks for hard-coded values in other files and removes those too.

    It’s all the little things like this that add up to a really good user experience.

    Details matter, my friends. Anyway, that’s enough Claude Code love. Let’s start cooking!

    Initial Setup

    First we need to install Claude Code. We’ll install it globally but call it locally. Open up your terminal (Warp.dev is a good one) and run this command anywhere (it’s a global installation so it doesn’t matter where):

    Bash
    curl -fsSL https://claude.ai/install.sh | bash

    Create your project directory and initialize Claude Code. I have a folder on my Mac called Projects. Inside that I have dozens of folders for different apps and projects. We’re going to create a finance-tracker folder for our app:

    Bash
    mkdir finance-tracker
    cd finance-tracker
    claude

    That last command spins up a REPL, a local instance of Claude scoped to that project folder, which means Claude can only see and interact with what’s inside this folder and any sub-folders.

    The first time you do this, it will walk you through some setup. Fairly straightforward, just follow the instructions. The only thing to watch out is the authentication.

    You can pay for Claude Code either via API (which is usage based) or connecting an existing Claude account (which you might have if you use the web app a lot).

    I suggest connecting an account because API costs might get out of hand. Start with the $20/month plan and if you’re hitting limits a lot, move up to the next tier.

    The Three Chat Modes

    Now that it’s set up, remember that we’re in an empty folder. Let’s ask Claude to create our project from scratch.

    There are 3 ways to chat with Claude. You can cycle through them anytime by pressing Shift+Tab.

    Default Mode

    You’re right now on what’s called the Default Mode. You tell Claude to do something, it suggests a change, waits for your permission, and then executes.

    With the new output styles feature, you can even ask Claude to explain why it’s doing what it’s doing. Type /output-style to find this.

    Auto Mode

    This is the true vibe coder mode. Claude works on your code and edits files without waiting for permission. You can tell it to work on a feature and go get coffee while it’s doing that.

    It will still ask for permissions to run certain bash commands (like installing a package). This is for security reasons, but there’s ways to get around this if you really want to YOLO:

    1. Type /permissions to add which commands it can run without asking for permissions
    2. Start claude with the –dangerously-skip-permissions flag to skip all permissions. I would not recommend this unless you’ve set up the advanced documentation and git workflows I describe later.

    Even on Auto-mode you can stop the process by hitting Esc if you think it’s going off course.

    Plan Mode: Strategic Thinking First

    The third and final mode is Plan Mode. Instead of jumping straight into code, Claude engages its extended thinking capabilities to create comprehensive strategies.

    Use Plan Mode when you’re about to start a new feature, tackle a complex challenge, refactor code, or basically any new project. You can control the depth of analysis with specific phrases like “think”, “think hard”, and “ultrathink” for increasing depth in analysis.

    Toggle through to plan mode and paste this in:

    Plaintext
    Hey Claude! I want to build a personal finance tracker web app. Here's the vibe:
    
    - Clean, modern interface (think Notion meets Mint)
    - Track income, expenses, and savings goals
    - Beautiful charts and insights
    - Built with React and a simple backend
    - Should feel fast and delightful to use

    Claude will now ask you a series of questions to clarify your intent. It could be questions around the architecture, the design, the user flow, whatever. Answer them as best you can.

    Once you do that, Claude will come back to you with a comprehensive plan. In my video I blindly accept it, but I suggest you give it some feedback to have more control over what it builds.

    Just hit Escape, type in your feedback, and Claude will redo the plan. Claude also saves the plan to a file called Plan.md which is a basic text file in markdown format. This is useful if you want to break up your session into multiple chats, or change the plan midway.

    When you’re happy with the plan, tell it to execute.

    Project Memory and Documentation

    I know this sounds boring but this is the most important part of using Claude Code. It’s the difference between actually getting a working app versus tearing your hair out in frustration.

    When Claude is done building out the first version of our app, type in /init. This initializes Claude when you use it in a project for the first time. If you have an existing project you want to bring Claude into, run this command first.

    When run, it makes Claude look through your entire project and create a Claude.md Markdown file. This is your project’s memory. It stores conventions, decisions, and context that persist across sessions.

    It should look something like this:

    Markdown
    # CLAUDE.md
    
    This file provides guidance to Claude Code (claude.ai/code) when working with code in this repository.
    
    ## Architecture
    
    This is a full-stack personal finance tracker with a React frontend and Node.js/Express backend:
    
    - **Frontend**: React 18 with Vite, single-page application with tab-based navigation
    - **Backend**: Express.js REST API with SQLite database
    - **Database**: SQLite3 with three main tables: transactions, categories, savings_goals
    - **Communication**: Frontend calls backend API at `http://localhost:3001/api/`
    
    The frontend uses a simple tab-based architecture managed by `App.jsx` with three main components:
    - Dashboard (overview/stats)
    - Transactions (CRUD operations)
    - Goals (savings goals management)
    
    Backend follows MVC pattern with routes handling API endpoints and database model managing SQLite operations.
    
    ## Database Schema
    
    SQLite database auto-initializes with three tables:
    - `categories`: id, name, color, icon (pre-populated with 9 default categories)
    - `transactions`: id, type (income/expense), amount, description, category_id, date
    - `savings_goals`: id, title, target_amount, current_amount, target_date

    Every time you start a chat with Claude Code, this document is added in as part of the prompt. So it helps to continuously refine this as your project evolves. You can edit it by directly editing the file or using the # command like this while you chat with it:

    Bash
    # Always use error boundaries around components that make API calls

    Get into the habit of using this as you’re working with Claude and you notice patterns you want to or don’t want to reinforce.

    Hierarchical CLAUDE.md Files

    Claude Code supports multiple CLAUDE.md files in a hierarchy, allowing you to organize knowledge at different levels of specificity. This is really helpful to manage context if your files and codebase become too large.

    A pattern I use is my primary Claude.md file for my project, and then a specific file for the frontend and backend, like so:

    Bash
    ~/.claude/CLAUDE.md                    # Global user preferences
    ~/projects/                            # Parent directory
    ├── CLAUDE.md                          # Organization/team standards
    └── finance-tracker-pro/
        ├── CLAUDE.md                      # Project-specific knowledge
        ├── backend/
           └── CLAUDE.md                  # Backend-specific patterns
        ├── frontend/
           └── CLAUDE.md                  # Frontend-specific patterns
        └── docs/
            └── CLAUDE.md                  # Documentation guidelines

    You can also set up a global Claude file that applies to all projects on your computer. This is where you can set personal preferences about the way you code or work.

    How Claude Processes the Hierarchy:

    • Claude reads all applicable CLAUDE.md files when starting
    • More specific files override general ones
    • All relevant context is combined automatically
    • Claude prioritizes the most specific guidance for each situation

    Additional Documentation

    In addition to Claude files, I also set up project documentation files and put them into a ‘docs’ folder. This is where I put my initial PRD, and other files for architecture, design principles, database schemas, and so on. Then, in my Claude.md file, I point to the documentation:

    Markdown
    # Finance Tracker Pro - Main Documentation
    
    docs/architecture.md
    docs/design-standards.md  
    docs/database-schema.md
    docs/testing-strategy.md
    
    ## Project Overview
    [Your main project description]

    This allows us to separate what goes into the prompt and fills up our context window (the Claude.md files) and what stays outside until it needs to be referenced.

    Team Sharing and Version Control

    CLAUDE.md files should be treated as critical project infrastructure and managed accordingly:

    • Commit CLAUDE.md files to your repository
    • Include them in code review processes
    • Use conventional commit messages for documentation changes
    • Tag major documentation updates

    Advanced Strategies

    1. Tell Claude to Do it For You – Simply tell Claude to update the documentation when you’ve finished a big feature or refactor as it has the full context of the work it just finished. You can also automate this with hooks or custom commands (more on this later).
    2. Quality and Code Standards – Embed comprehensive quality standards directly in your doc files to ensure consistent code quality.
    3. Onboarding New Team Members: New developers can get up to speed by having Claude explain the codebase

    Managing Context

    When you start a new chat with Claude, it pulls your Claude.md files into its context window. A context window is the maximum amount of text (measured in tokens) a model can consider at once when generating a response.

    As you chat with it, the conversation history is stored in this context window, along with any other files it reads, code it generates, and tool results.

    This can fill up fast and at some point you’ll notice a little notification at the bottom right warning you that the context window is running out. In fact, if you asked Claude to one-shot our finance app, you’ll definitely see this.

    Once the context runs out, Claude automatically compresses (summarizes) the conversation, and continues from there.

    We want to avoid this because we might lose important context. We also want to actively manage what goes into the context so that it doesn’t get confused. Here are my best practices:

    1. Scope a chat to one project or feature so that all the context stays relevant.
    2. The moment you’re done with the feature, use the /clear command to clear out the context and start a fresh conversation.
    3. If you ever need to come back to the conversation, you can use the /resume command.
    4. If you think the project or feature might be too big for one context window, ask Claude to break it down into a project plan and save it to a markdown file (which it does automatically if you start in plan mode). Then, ask Claude to pick off the first part and finish it in one chat. When that’s done, tell Claude to update the plan, clear the chat, and ask it to reference the plan and continue from there.

    If you do get to a point where you’re running out of context but can’t clear it all yet, you can use /compact with instructions on what to save:

    Markdown
    /compact Focus on preserving our current authentication implementation and the database schema decisions we've made.

    Note: Anthropic recently increased Sonnet’s context window to 1 million tokens. That’s the entire works of Shakespeare, but that doesn’t mean you shouldn’t still follow these tips to keep Claude focused.

    Deploying Sub-agents

    Sub-agents are an advanced way of managing context. They are specialized AI assistants with their own instructions, context windows, and tool permissions.

    For example, you can set up different sub-agents to review code, test code, and update documentation.

    Bash
    You  Main Claude (coordinator)
        ├── Code Reviewer (quality specialist)
        ├── Test Engineer (testing specialist)
        └── Documentation Writer (technical writing specialist)

    As our main Claude builds the feature, it intelligently routes requests to appropriate sub-agents based on context analysis, but you can also call agents explicitly when needed.

    Each sub-agent maintains its own conversation history and context, so your main chat with Claude doesn’t get filled with the context of the sub-agent. You can also limit their access to certain tools.

    Setting up a sub-agent is easy, Claude does it for you! Just use the /agents command, follow the instructions, and tell Claude what kind of sub-agent you need. You’ll see them show up in a new agent folder as markdown files.

    Feel free to edit these files. This is also a great place to add more context or documentation. For example, you can get very specific about how to run a code review in the subagent, and leave general coding standards for shared documentation.

    Markdown
    ---
    name: code-reviewer
    description: Comprehensive code quality and maintainability analysis
    tools: read, grep, diff, lint_runner
    ---
    
    You are an expert code reviewer:
    
    ## Review Priorities (in order):
    1. **Logic errors and bugs** that could cause system failures
    2. **Security vulnerabilities** and data protection issues
    3. **Performance problems** that impact user experience
    4. **Maintainability issues** that increase technical debt
    5. **Code style and consistency** with project standards
    
    ## Review Process:
    - Analyze code for business logic correctness
    - Check error handling and edge case coverage
    - Verify proper input validation and sanitization
    - Assess impact on existing functionality
    - Evaluate test coverage and quality
    
    IMPORTANT: Only report significant issues that require action.
    Provide specific, actionable improvement suggestions.

    Usage Pattern: When you finish working on a feature, instead of running the tests and reviewing the code in the same chat, you can hand it off to the sub-agent. They’ll do their thing and send results back to the main chat without filling up the context window.

    Saving Your Work

    At this point, we should have our core project built out with proper documentation and context management strategies. This helps Claude stay on track but it still doesn’t stop it from making a mistake.

    If you’re new to vibe coding, you may have experienced the equivalent of the blue screen of death where something goes wrong, the agent can’t fix it, and you have to start all over again. If you haven’t experienced that yet, well, it’s better to be safe than sorry.

    Git Branches

    To do that, we’ll use Git to ensure Claude doesn’t mess with our core code. I won’t explain what it is or how it works (not in scope for this tutorial) but suffice it to say it’s not as scary as it sounds and Claude will help you.

    Here’s what you do:

    1. Every time you want to start a new project or feature, ask Claude to create a new branch first. This basically puts you in a new “version” of your code so that any changes you make are isolated to this branch and don’t impact the main branch. This means if you mess everything up, you can simply switch back to main and delete this branch.
    2. When Claude is done, ask it to test the app. We will get into testing strategies later but for now let Claude do it’s default testing. You should also run the app yourself to see if there are any errors.
    3. If it all looks good, have Claude update the documentation if needed (as I mentioned earlier), and then ask it to commit changes.
    4. If this is a multi-part feature, repeat the above steps. When you’re done and satisfied with everything, tell Claude to merge it back into the main branch.

    See, that wasn’t so hard, was it? Let’s ramp up the complexity.

    Git Worktrees

    Git worktrees let you check out multiple branches simultaneously, each in its own directory. Combined with Claude Code, this means:

    • Multiple Claude instances can work on different features in parallel
    • Each Claude maintains its own conversation context and project understanding
    • No context switching overhead or lost momentum
    • True parallel development without conflicts

    Here’s what the structure might look like:

    Bash
    ~/finance-tracker/          # Main repository
    ├── .git/                       # Shared Git database
    ├── src/
    ├── CLAUDE.md
    └── package.json
    
    ~/finance-tracker-budgets/      # Worktree for budget features
    ├── .git  ../finance-tracker-pro/.git  # Links to main repo
    ├── src/                        # Independent file state
    ├── CLAUDE.md                   # Same project knowledge
    └── package.json               # Potentially different dependencies
    
    ~/finance-tracker-reports/      # Worktree for reporting features
    ├── .git  ../finance-tracker-pro/.git
    ├── src/
    └── ...

    To create a worktree, you can ask Claude to create one, or just do it yourself:

    Bash
    # From your main project directory
    cd finance-tracker
    
    # Create a worktree for budget features
    git worktree add ../finance-tracker-budgets -b feature/budget-system
    
    # Create a worktree for reporting
    git worktree add ../finance-tracker-reports -b feature/reporting-dashboard
    
    # List all worktrees
    git worktree list

    Then, you start a new Claude in each one:

    Bash
    # Terminal 1: Budget features
    cd ../finance-tracker-budgets
    claude --dangerously-skip-permissions
    
    # Terminal 2: Reporting features (new terminal window)
    cd ../finance-tracker-reports
    claude --dangerously-skip-permissions
    
    # Terminal 3: Main development (new terminal window)
    cd finance-tracker
    claude

    We’re dangerously skipping permissions so that Claude can do it’s thing without waiting for us. But that’s ok because any screw ups will be isolated to that worktree.

    For each worktree, follow the same strategies we’ve covered so far. When it’s time to merge it back into main, Claude can help with any merge conflicts.

    Checkpoints

    There have been times where I’ve made a bunch of changes on main, or Claude got a bit eager and made changes when I just asked a question. If that happens, and you don’t like the changes, simply rewind back the conversation.

    Type in /rewind and you’ll see a list of the messages you have sent Claude in the current session. Just select the message you sent to Claude before it went trigger-happy and you’ll go right back to that point as if none of the changes were ever made.

    Custom Slash Commands

    I’ve been introducing you to various slash commands, which you can see when you type ‘/’ while chatting with Claude. The ones you see in the list come as Claude defaults, but you can create your own!

    Custom slash commands let you encode repeatable processes and workflows that are specific to your team or project.

    You first setup a folder to store the custom commands as markdown files.

    Bash
    mkdir -p .claude/commands

    Now create markdown files in that folder for each custom command. For example, you might want one to review all code in your codebase which you might call every so often.

    Create /review command (.claude/commands/review.md):

    Markdown
    Perform a comprehensive code review of recent changes:
    1. Check code follows our TypeScript and React conventions
    2. Verify proper error handling and loading states
    3. Ensure accessibility standards are met
    4. Review test coverage for new functionality
    5. Check for security vulnerabilities
    6. Validate performance implications
    7. Confirm documentation is updated
    
    Use our established code quality checklist and update CLAUDE.md with any new patterns discovered.

    Team Command Sharing

    Custom commands stored in .claude/commands/ are automatically shared when team members clone your repository. This creates consistent workflows across your entire development team.

    Now you can simply type /review to execute the workflow anytime during development.

    Ask claude to do it for you

    You can simply ask Claude to create a custom slash command for you. As homework, try asking it to create a command called /branch which when called checks the current git status and, if all is good, creates a new git branch and moves into it.

    And from now on, every time you start a new feature, just type in /branch and you’re good to go!

    Model Context Protocol (MCP) Servers

    MCP is Anthropic’s open standard for connecting AI assistants to external tools and data sources. Think of it as the universal connector that allows Claude Code to interact with any system in your development workflow – Jira, GitHub, whatever.

    For more information about what MCP is and how it works, see my full tutorial here.

    Common MCP servers

    To add a new MCP server, type this in:

    Bash
    # Web search capabilities  
    claude mcp add brave-search -s project -- npx @modelcontextprotocol/server-brave-search

    Check MCP status:

    Markdown
    /mcp

    Using MCP servers:

    Markdown
    Search for best practices for financial data security and implement appropriate measures in our API.

    Now Claude can search the web for current best practices and implement them in your code.

    There are plenty of MCP servers out there and you can create your own. Use official servers (the ones listed on Anthropic’s site) or build your own if you must.

    For many of my projects, I use Supabase as a database, so I have a custom MCP setup allowing Claude Code to access my database.

    Puppeteer is also another good one, allowing Claude to access websites, navigate them, and even take screenshots, which is useful for debugging your own app.

    Claude Skills

    A Skill is a set of instructions and/or code that Claude can run over and over again, on demand. They’re kinda like custom slash commands, except more powerful.

    Let’s say you want to update your team via Slack every time you push a new feature. You may have a Slack MCP or a custom script set up already but then you’d have to tell Claude to run this process every single time.

    Instead, now you can just package up the instructions into a Skill. From the Skill metadata, Claude knows to use that skill when you’re pushing code, and will automatically do that.

    For example, let’s say you want Claude to create designs following certain design specifications and guidelines. You simply store it all in a new Skill and ask Claude to use that skill.

    For a deeper dive, read my full Claude Skills tutorial here.

    Hooks – Deterministic Automation

    Hooks are user-defined shell commands that execute automatically at specific points in Claude Code’s lifecycle. They provide guaranteed automation that doesn’t rely on Claude “remembering” to do something.

    • PreToolUse – Before Claude executes any tool (file edits, commands)
    • PostToolUse – After a tool completes successfully
    • Notification – When Claude sends notifications
    • Stop – This runs when Claude finishes up a task
    • Sub-agent Stop – This runs when a sub-agent finishes a task

    You can set up hooks by typing in /hooks. You’ll be asked to select one of the options from above. If you select pre or post tool use, you’ll have to specify which tool first before you add your hook.

    For example, when Claude finishes writing to a file, you can set up a post tool use hook to update your documentation.

    Building a Testing Strategy

    Instead of manually setting up testing frameworks and writing boilerplate, you can describe your testing philosophy and let Claude Code build the entire infrastructure.

    Let’s approach testing systematically. Start with this conversation:

    Plaintext
    I want bulletproof testing for our finance tracker. Here's what I'm thinking:
    
    - Unit tests for all utility functions (currency formatting, date calculations, validation)
    - Component tests using React Testing Library for every UI component
    - Integration tests for our API endpoints with proper database setup/teardown
    - End-to-end tests for critical user flows like adding transactions and viewing reports
    - Performance tests to ensure the app stays fast as data grows
    
    Set up the testing infrastructure with proper configuration, then write comprehensive tests for our existing features. I want to be confident that changes won't break anything.

    Claude will analyze your existing codebase to understand the testing needs, install and configure various packages, and create testing utilities specific to your finance tracker.

    The really impressive part is how Claude Code creates tests that actually reflect your business logic. It understands that a finance app needs to handle edge cases around currency, negative numbers, and data validation.

    Setting Up Production-Ready CI/CD

    Now let’s tackle deployment automation. Try something like this:

    Markdown
    I need a rock-solid CI/CD pipeline for our finance tracker. Here's what I want to happen:
    
    For every pull request:
    - Run the full test suite (unit, integration, E2E)
    - Check TypeScript compilation 
    - Verify code formatting with Prettier
    - Run ESLint for code quality issues
    - Build the production bundle successfully
    - Run security audits on dependencies
    - Check for any breaking changes
    
    For main branch merges:
    - Everything from PR checks
    - Deploy to a staging environment automatically
    - Run smoke tests against staging
    - Send a Slack notification about deployment status
    
    For tagged releases:
    - Deploy to production with zero downtime
    - Run post-deployment health checks
    - Update monitoring dashboards
    
    Make this bulletproof - I never want broken code to reach production.

    Claude Code will create a comprehensive GitHub Actions workflow that’s tailored to your specific application. It’ll also create the npm scripts referenced in the workflow, set up environment-specific configurations, and even create deployment scripts for your specific hosting platform.

    If you’re using a different hosting service or have specific requirements, just tell Claude and it’ll adapt the entire pipeline accordingly. For example, I use Vercel, which Claude is already well-versed with, and deployment becomes a breeze.

    Performance Optimization

    Performance optimization with Claude Code is particularly impressive because it takes a data-driven approach rather than applying generic optimizations.

    Let’s say your finance tracker is starting to feel sluggish with a lot of transaction data. Here’s how to approach optimization with Claude Code:

    Markdown
    Our finance tracker is getting slower as users add more transactions. I'm seeing these specific issues:
    
    - Dashboard takes 3+ seconds to load when users have 1000+ transactions
    - The transaction list scrolling feels janky
    - Our bundle size has grown to over 1MB
    - API responses for transaction queries are taking 400ms+
    
    I want to optimize this systematically. Start with a performance audit - analyze our bundle, identify database query bottlenecks, and find frontend performance issues. Then implement the highest-impact optimizations first.
    
    I want to see before/after metrics for everything we change.

    Again, you’ll see Claude plan it out first, break it down into multiple steps, and then work on them iteratively until its done. Finally, you’ll see the improvements and before and after metrics as proof!

    Claude Code Web, Mobile, and Desktop

    The CLI is not the only way to access Claude Code. If you use the Claude web app on claude.ai, you may have noticed a little </> icon in the sidebar. This is Claude Code in the cloud. Cloud Code if you will. Ok I’ll shut up.

    Click on it and you’ll be asked to connect your GitHub account. When that’s done, you should see something like this:

    This version of Claude Code allows for true autonomous coding. It’s not as full featured as the CLI but that’s fine because it has a different purpose.

    The main usage of this should be for giving Claude tasks that don’t require your active involvement, or complex coding work. Think bug fixes, documentation, minor website tweaks, and so on.

    When you start a chat and ask Claude to do something in the app, it clones your Git repo into a virtual sandbox and starts writing code. It can autonomously run until the task is complete, at which point you can create a Pull Request and review the work. If it’s good, merge it into main. If not, toss it.

    What this means is that you can now have Claude working for you behind the scenes remotely. It works on the web app, the mobile app, and on the desktop app (with the added benefit of being able to work locally vs just in the cloud).

    Imagine you’re at a cafe and someone writes in saying there’s a small bug in your app. You take your phone out, open up the Code section in the Claude app, and have it diagnose and fix the bug.

    After you’re done with your coffee, Claude notifies you that it’s done. You look at the code, make sure it’s good, and then push it to production and the bug is fixed!

    More on this in the video below.

    Conclusion: From Code Assistant to Development Partner

    And that’s all for today!

    If you’ve followed along, you should have a working app that’s ready to deploy to the world. When I ran it (which you can see in my video above) with very little input, it built a fully functioning app with no errors or bugs in one-shot.

    That’s amazing, and it’s why people are loving it. Claude models are already SOTA for coding, and with Claude Code, it makes it agentic with abilities on par with a decent mid-level software engineer.

    Meaning, you can rely on it to build a functioning and secure app (especially if you use the advanced workflows I mention) through pure prompting!

    I think that’s pretty wild.

  • Your brain on ChatGPT: Is it making you dumber?

    Your brain on ChatGPT: Is it making you dumber?

    There’s a research paper that’s been making the rounds recently, a study by MIT’s Media Lab, that talks about the cognitive cost of using LLMs (Large Language Models that power AI apps like ChatGPT).

    In the study, researchers asked 54 participants to write essays. They divided them into 3 groups – one that could use ChatGPT, one that could only use a search engine like Google, and the third (Brain-only) that couldn’t use any tool.

    And, surprise surprise, they found that ChatGPT users had the lowest brain engagement, while participants who use only their brains to write the essays had the highest. ChatGPT users also had a harder time recalling quotes from the essay.

    No shit.

    Let’s leave aside the fact that 54 participants isn’t statistically significant and that writing an essay is maybe not a comprehensive test of cognitive load. The paper is essentially saying that if you use AI to help you think, then you are reducing the cognitive load on your brain. This is obvious.

    Look, if you use ChatGPT to write an entire article for you, without any input, then of course you’re not using your brain. And of course you’re not going to remember much of it, you didn’t write it!

    Does that mean it’s making you dumber? Not really.

    But it’s also not making you smarter. And that should be obvious to you too.

    Active vs passive mode

    AI is a tool, like any other, and there’s a right way to use it and a wrong way to use it.

    If I need to study a market to evaluate an investment opportunity, I could easily ask ChatGPT to run deep research on the market, and then write up a report. It would take a few minutes, as opposed to a few hours if I did it myself.

    Even better, I can ask ChatGPT to make an investment recommendation based on the report. That way I don’t even need to read it!

    But have I learned anything at all from this exercise? Of course not. The only work I did was write a prompt, and then AI did everything else. There was no input from me, not even a thought.

    Again, all of this is obvious, but it’s also the default mode for most people using AI. That’s why the participants in the study showed low levels of brain activity. They asked AI to do all the work for them.

    This is the passive mode.

    But there’s a better way, one where you can use AI to speed things up and also learn and exercise critical thinking.

    I call this active mode.

    Thinking with AI

    Any task can be broken down into steps that require critical thinking or creative input, and steps that don’t. In the market research example, searching doesn’t require critical thinking but understanding it and writing a report does.

    In active mode, we use AI to do the steps that don’t require critical thinking.

    We use ChatGPT Deep Research to find relevant information, but we read it. And once we read it, we figure out what’s missing and ask ChatGPT to search for that information.

    When we’re done understanding the market, we write the report and we ask ChatGPT to help us improve a sentence or paragraph. We decide what information to put into the report but we ask ChatGPT to find a source to back it up.

    And when we’re done, we ask ChatGPT to poke holes in our report, and to ask us questions that haven’t been covered. And we try to answer those questions ourselves, and go back to our research or ask ChatGPT to research more if we don’t have the answers.

    Writing a report, planning a project, building an app, designing a process, anything can be done this way, you doing the critical thinking and creative stuff, and AI doing the rest.

    You just need to make this your default way of using AI.

    Practical Steps for Active AI Use

    Here’s how to make active mode your default:

    1. Start with Your Framework

    Before touching AI, spend 5-10 minutes outlining:

    • What you’re trying to accomplish
    • What you already know about the topic
    • What questions you need answered
    • How you’ll evaluate success

    This prevents AI from hijacking your thought process from the start.

    2. Use AI for Research

    Ask AI to find information but don’t ask it to summarize it without reading through it yourself

    • Instead of: “What does this data mean for my business?”
    • Try: “Find data on customer churn rates in SaaS companies with 100-500 employees”

    Then draw your own conclusions about what the data means.

    That’s not to say you shouldn’t ask AI to analyze data. You absolutely should, but after you draw your own conclusions as a way to uncover things you’ve missed.

    3. Think Out Loud With AI

    Use AI as a sounding board for your thinking:

    • “I’m seeing a pattern in this data where X leads to Y. What other factors might explain this relationship?”
    • “My hypothesis is that Z will happen because of A and B. What evidence would support or contradict this?”

    4. Ask AI to Challenge You

    After developing your ideas, ask AI to poke holes:

    • “What assumptions am I making that might be wrong?”
    • “What questions haven’t I considered?”
    • “What would someone who disagrees with me say?”

    5. Use the 70/30 Rule

    Aim for roughly 70% of the cognitive work to come from you, 30% from AI. If AI is doing most of the thinking, you’re in passive mode.

    6. Maintain Ownership of Synthesis

    AI can gather information and even organize it, but you should be the one connecting dots and drawing conclusions. When AI offers synthesis, use it as a starting point for your own analysis, not the final answer.

    7. Test Your Understanding

    Regularly check if you can explain the topic to someone else without referencing AI’s output. If you can’t, you’ve been too passive.

    When Passive Mode Is Fine

    Active mode isn’t always necessary. Use passive mode for:

    • Getting quick background on unfamiliar topics
    • Formatting and editing tasks
    • Generating initial ideas to spark your own thinking
    • Routine tasks that don’t require learning or growth

    The Long Game

    The MIT study participants who relied entirely on AI showed less brain engagement, but they also completed their tasks faster. That’s the trade-off: immediate efficiency versus long-term capability development.

    In active mode, you might take slightly longer upfront, but you build knowledge, develop better judgment, and create mental models you can apply to future problems.

    The goal isn’t to avoid AI or to make every interaction with it a learning exercise. It’s to be intentional about when you’re thinking with AI versus letting it think for you.

    Think with AI, anon.

  • How I Write With AI (Without Creating Slop)

    How I Write With AI (Without Creating Slop)

    The best performing post on this blog is a 20,000 word tome on the Google Agent Development Kit. Granted, maybe half the words are code samples, but without AI this would have taken me weeks to write. With AI, it was just a few days.

    Great articles, the kind that get shared in Slack channels, bookmarked for later, or ranked on Google or ChatGPT, don’t just happen. They require deep research, careful structure, compelling arguments, and that yo no sé qué quality we call a tone or voice.

    They need to solve real problems, offer genuine insights, and reflect the author’s hard-earned expertise.

    The traditional writing process goes something like this: ideation (where you wrestle with “what should I even write about?”), research (down the rabbit hole of sources and statistics), outlining (organizing your scattered thoughts into something coherent), drafting (the actual writing), editing (realizing half of it makes no sense), revising (again), and finally polishing (until you hate every word you’ve written).

    That’s a lot of work. For a 2,000-word post like the one you’re reading, probably a couple of days of work. And then AI came along and everyone thought they could short-circuit this process with “vibe marketing”, and now we have slop everywhere and no one wins.

    Stop serving slop

    The problem is that most people have fallen into one of two camps when it comes to AI writing:

    Camp 1: The AI Content Mills

    These are the people who’ve decided that if AI can write, then obviously the solution is to generate unlimited blog posts and articles with minimal human input. More content equals more traffic equals more success, right?

    They’re pumping out dozens of articles per week, each one a generic regurgitation of the same information you can find anywhere else, just rearranged by an algorithm.

    Who’s going to read this? They are bots creating content for other bots. Any real human traffic that hits their site will take one look at it and then bounce.

    Camp 2: The One-Prompt Writers

    On the flip side, you’ve got well-meaning writers who heard AI could help with content creation, so they fired up ChatGPT and typed something like “write me a 2000-word article on productivity.”

    Twenty seconds later, they got back a wall of text that reads like it was written by an intern who’d never experienced productivity problems themselves, which, in a way, it was.

    Frustrated by the generic drivel, they declared AI “not ready for serious writing” and went back to their caves, doing everything the old way. They still create good content, but it takes long and requires too many resources.

    Both camps are missing the point entirely. The problem isn’t AI itself. It’s over-reliance on automation without essential quality control measures in place. They’re both treating AI like a magic one-click content machine.

    The Missing Ingredient: Your Actual Brain

    Here’s a novel concept. What if humans want to read content that is new and interesting?

    Think about what you bring to the writing table that no AI can replicate… creativity, emotional intelligence, ethical reasoning, and unique perspectives. Your years of experience in your field. Your understanding of your audience’s real pain points. Your ability to connect seemingly unrelated concepts. Your voice, your humor, your way of explaining complex ideas.

    AI, meanwhile, excels at the stuff that usually makes you want to procrastinate, like processing vast amounts of information quickly, organizing scattered thoughts into logical structures, and generating that dreaded first draft that’s always the hardest part.

    Two entities with complementary skill sets. You and the AI. Like Luke and R2-D2.

    You’re the director, the editor, the strategic thinker, and the voice curator. AI is the research assistant and first-draft collaborator.

    You are what makes the content new and interesting. AI helps you shape it.

    My AI Writing Process

    Let me walk you through exactly how I’ve been using this collaboration to go from scattered thoughts to published article in 1-2 hours instead of a full day, while actually improving quality.

    Step 1: I Pick the Topic

    This is where your expertise and market understanding are irreplaceable. I don’t ask AI “what should I write about?” That’s a recipe for generic content that already exists everywhere else.

    Instead, I pick topics that genuinely interest me or that I think are timely and underexplored. For example, my piece on ChatGPT’s glazing problem, or my deep dive into Model Context Protocol.

    The blog post you’re reading right now came from a tweet (xeet?) I responded to.

    I start by doing what I call the “thesis dump.” I open a new chat in my dedicated Claude project for blog content and just brain-dump everything I think about the topic. Stream-of-consciousness thoughts, half-formed arguments, random observations, and whatever connections I’m seeing that others might not.

    Pro-tip: Create a Claude project specifically for blog content (or whatever type of content you write), upload samples of past work or work you want to emulate, and give it specific instructions on your writing style and tone.

    Pro-pro-tip: Use the voice mode on Claude’s mobile app or Wispr Flow on your computer to talk instead of type. And just ramble on, don’t self-edit.

    This dump becomes the foundation of everything that follows. It’s my unique perspective, my angle, my voice. The stuff that makes the eventual article mine rather than just another generic take on the topic.

    Step 2: AI Does the Research Legwork

    Now comes the part where AI really shines. AI excels at supporting literature review and synthesis, processing vast amounts of information that would take me hours to gather manually.

    I ask AI to research the topic thoroughly. Before Claude had web search, I’d use ChatGPT for this step. The key questions I want answered are:

    • What’s already been written on this topic?
    • What angles have been covered extensively?
    • What gaps exist in the current conversation?
    • What data, statistics, or examples support (or challenge) my thesis?

    This research phase is crucial because understanding the landscape helps you write something better than what already exists. I’m not looking to regurgitate what everyone else has said. I want to know what they’ve said so I can say something different, better, or more useful.

    The AI comes back with a comprehensive overview that would have taken me hours to compile. Sometimes it surfaces angles I hadn’t considered. Sometimes it finds data that strengthens my argument. Sometimes it reveals that my hot take has already been thoroughly explored, saving me from publishing something redundant.

    My WordPress is littered with drafts of posts I thought I were genius insights only to find out smarter people than I have covered everything on the topic.

    Step 3: Collaborative Outlining

    This is where the collaboration really starts to sing. I ask Claude to create an outline that brings my original thesis dump and the research it has gathered together.

    Here it becomes a cycle of drafting, editing, and reworking where I’m actively shaping the structure based on my strategic vision.

    “Move that section earlier.” “Combine these two points.” “This needs a stronger opener.” “Add a section addressing the obvious counterargument.” And so on.

    By the time I’m done with this back-and-forth, usually about 30 minutes, I’ve got something that looks like a mini-article. It’s got a clear structure, logical flow, and it’s heavily influenced by both my original thinking and the research insights. Most importantly, it already feels like something I would write.

    Step 4: Section-by-Section Development

    Now comes the actual writing, but in a much more manageable way. Instead of staring at a blank page wondering how to start, I work with AI to flesh out each section one by one.

    My guiding principle is to maximize information per word. Every section needs to drive home one key concept or argument, and it needs to do it efficiently. No padding, no fluff, no generic statements that could apply to any article on any topic.

    I’ll say something like, “For the section on why most AI content fails, I want to emphasize that it’s not the technology’s fault, it’s how people are using it. Include specific examples of both failure modes, and make sure we’re being concrete rather than abstract.”

    Just like with outline creation, I’m working with AI closely to refine each individual section. “Make this more conversational.” “Add a specific example here.” “This paragraph is getting too long, break it up.”

    I’ll also directly make edits myself. I add sentences or rewrite something completely. No sentence is untouched by me. AI handles the initial generation and helps maintain consistency, but I ensure the voice, examples, and strategic emphasis stay authentically mine.

    Step 5: The Critical Review

    Here’s a step most people skip, and it’s what separates good AI-human collaboration from slop.

    I ask AI to be my harshest critic.

    “Poke holes in this argument.” “Where am I not making sense?” “What obvious questions am I not answering?” “Where could someone legitimately disagree with me?” “What gaps do you see in the logic?”

    This critical review often surfaces weaknesses I missed because I was too close to the content. Maybe I’m assuming knowledge my readers don’t have. Maybe I’m making a logical leap without explaining it. Maybe I’m not addressing an obvious counterargument.

    I don’t blindly accept the AI’s critique though. Sometimes it gets it wrong, or I just don’t agree with it. But sometimes it gets it right and I fix the issues it identifies.

    Step 6: The Sid Touch

    Now comes the final step, no AI involved here. I go through the entire article, put myself in the reader’s shoes, and make sure it flows well. I make edits or change things if needed.

    I’ll also add a bit of my personality to it. This might be a joke that lightens a heavy section, a personal anecdote that illustrates a point, or just tweaking the language to sound more like how I actually talk.

    I call this the “Sid touch” but you can call it something else. Sid touch has a nice ring to it.

    “Hey did you finish that article on productivity?”

    “Almost! Just giving it a Sid touch.”

    See what I did there?

    Proof This Actually Works

    What used to take me the better part of a day now takes an hour or two tops if I’m being a perfectionist. But more importantly, the quality hasn’t suffered.

    I actually think it has improved because the research and outline process is more thorough. The structure is more logical because we’re iterating on it deliberately. The arguments are stronger because I’m actively testing them during the writing process.

    I started writing this blog in February this year and I’m already on track to go past 5,000 monthly visitors this month, with hundreds of subscribers. Not because I’m publishing a ton of content (I’m not), but because I’m combining AI’s data processing capabilities with my creativity and strategic thinking to create genuinely useful content.

    The Future of Content Writing

    If you’re thinking this sounds like too much work and you’d rather create a fully automated AI slop factory, I can promise you that while you may see some results in the short-term, you will get destroyed in the long term.

    Platforms will get better at filtering AI slop, just like they learned to handle email spam. It’s already starting to get buried in search results and ignored by readers.

    That means the writers who figure out effective human-AI collaboration now will have a massive competitive advantage. While others are either avoiding AI entirely or drowning their audiences in generic content, you’ll be creating genuinely valuable content faster than ever before.

    So here’s my challenge to you: audit your current writing process. Are you spending hours on research that AI could handle in minutes? Are you staring at blank pages when you could be starting with a solid structure? Are you avoiding AI because you tried it once and got generic results?

    Or maybe you’re on the other extreme, using AI to replace your thinking instead of amplify it?

    If so, try the process I’ve outlined. Pick a topic you genuinely care about, dump your thoughts, let AI help with research and structure, then work together section by section while keeping your voice and expertise front and center.

    Let me know how it goes!

    Get more deep dives on AI

    Like this post? Sign up for my newsletter and get notified every time I do a deep dive like this one.

  • The Make.com Automation Guide for GTM and Operations

    The Make.com Automation Guide for GTM and Operations

    The CEO of Zapier recently announced that they have more AI agents working for them than human employees. Now that sounds exciting and terrifying but the truth is most of the “agents” he listed out are really just simple automations (with some AI sprinkled in).

    He is, after all, promoting his own company, which he uses to build these automations.

    In this guide, I will show you how to build those same automations on Make.com. It’s designed for business owners, no-code enthusiasts, and consultants looking to automate real-world tasks in marketing, sales, and operations.

    The first thing you need to do is create a Make.com account. Sign up here to get one month free on the Pro plan.

    I’ve split this guide up into sections for Marketing, Sales, HR, Product, and Customer Support. The following automations are beginner-friendly and the best way to learn is to follow the instructions and build it yourself.

    If you’re looking to build more complex AI Agents, I have a full guide here. I also have a free email course which you can sign up for below.

    High-Impact Use Cases for Marketing Teams

    Write a blog post, summarize it for LinkedIn, create social variations, send campaign results to the team, draft the newsletter…and repeat. Every. Single. Week.

    You’re drowning in content demands and half of it is grunt work that AI can now handle. Enter: Make.com + AI.

    This combo turns your messy marketing checklist into an elegant flowchart. You write once, and AI helps you remix, repurpose, and report across all your channels.

    Here’s what you can automate today:

    • Turn blog posts into LinkedIn content
    • Repurpose content into tweets, emails, or IG captions
    • Summarize campaign performance into Slack reports
    • Generate social variations for A/B testing
    • Create email copy from feature releases
    • Summarize webinars or podcasts for newsletters

    Let’s build a few of these together.

    Project 1: Blog to LinkedIn Auto-Post

    Scenario: You’ve just published a blog post. Instead of opening LinkedIn and crafting a summary from scratch, this automation turns your post into a social-ready snippet instantly.

    How it works: Make.com watches your RSS feed for new content. When a new blog post is detected, it sends the blog’s title and content to Claude or OpenAI with a carefully constructed prompt. The AI replies with a LinkedIn-ready post featuring a hook and CTA. This is then routed to Buffer for scheduling or Slack for internal review. All content can be logged to Google Sheets or Airtable for records and team collaboration.

    Step-by-Step Walkthrough:

    1. Trigger on New Blog Post (RSS Module)
      • Drag the RSS module into your Make.com scenario.
      • Enter your blog’s RSS feed URL (e.g., https://yourblog.com/rss).
      • Set the module to check for new posts every X minutes.
      • Ensure the output includes title, link, and content/excerpt.
    2. AI Content Creation (OpenAI Module)
      • Add the OpenAI module (ChatGPT model) or Claude by Anthropic.
      • Create a prompt like:”You are a copywriter creating LinkedIn posts for a B2B audience. Write a short, engaging post that summarizes this blog. Include a 1-line hook, 1–2 insights, and end with a call-to-action. Blog title: {{title}}, Excerpt: {{content}}.”
      • Choose GPT-4o for Claude Sonnet 4 (I prefer Claude).
      • Output should be plain text.
    3. Routing Options (Router Node)
      • You can either insert a Router node after the OpenAI output or do this in a sequence (like my setup above).
      • Route A: Manual Review
        • Add Slack module.
        • Post the AI-generated copy to #marketing-content.
        • Include buttons for “Approve” or “Revise” via Slack reactions or separate review workflows.
      • Route B: Auto Schedule
        • Add Buffer or LinkedIn module.
        • Schedule the post directly.
        • Add time delay if needed before posting (e.g., delay by 30 min to allow override).
    4. Log It (Google Sheets or Airtable)
      • Add a Google Sheets or Airtable module.
      • Create a row with blog title, link, and generated post.
      • Optional: Include timestamp and user who approved the content.

    Optional Enhancements:

    • Add a “fallback content” path if AI fails or times out.
    • Use a Make “Text Parser” to clean up or trim content to fit platform character limits.
    • Add UTM parameters to links using a “Set Variable” step before publishing.

    Why this helps: This flow cuts down repetitive work, ensures content consistency, and keeps your distribution engine running on autopilot with human review only when needed.

    Project 2: AI Campaign Performance Digest

    Scenario: When I started my career in marketing, over a decade ago, before AI, I would manually compile Google Ads campaign reports every Monday morning. Today, AI does it for you, and shares a clean summary to Slack every morning.

    How it works: Make.com runs a scheduled workflow each morning. It pulls campaign data from Google Ads, sends it to GPT-4o with a prompt designed to extract insights, and then posts a summary digest to a Slack channel.

    Step-by-Step Walkthrough:

    1. Trigger on Schedule:
      • Use the “Scheduler” module in Make.
      • Set the time to run daily at 8:00 AM (or whatever cadence fits your reporting cycle).
    2. Fetch Campaign Data (Google Ads Module):
      • Add a Google Ads module.
      • Authenticate with your account and select the appropriate campaign.
      • Configure it to retrieve key metrics like impressions, clicks, CTR, cost, conversions, and ROAS.
      • Ensure the output is formatted clearly to be used in the next step.
    3. Summarize Metrics (OpenAI Module):
      • Add an OpenAI (ChatGPT) module.
      • Use a system + user prompt combo to ensure structured output: System: “You are a digital marketing analyst summarizing ad performance.” User: “Summarize the following Google Ads metrics in 3 concise bullet points. Highlight performance trends, wins, and concerns. Metrics: {{output from Google Ads module}}”
      • Choose GPT-4o for better language quality and reliability.
    4. Post to Slack (Slack Module):
      • Add the Slack module and connect your workspace.
      • Send the AI summary to your marketing channel (e.g., #ads-daily).
      • Format the message cleanly using markdown, and optionally include a link to the Google Ads dashboard for deeper inspection.
    5. Log for Reference (Optional):
      • Add a Google Sheets or Airtable module to log the raw metrics + AI summary.
      • Include a date stamp and campaign ID for tracking trends over time.

    Optional Enhancements:

    • Add a fallback message if AI output is blank or token limits are exceeded.
    • Use a router to conditionally summarize different campaign types differently (e.g., brand vs. performance).
    • Include comparison to previous day or week by pulling two data sets and calculating diffs before sending to GPT.

    Why this helps: It delivers a high-signal snapshot of ad performance daily without wasting your time, and keeps everyone on the same page.

    Project 3: AI Content Research Assistant

    Scenario: You’re planning a new blog post, campaign, or social series and need quick, high-quality content research. Instead of spending hours googling stats, quotes, and trending ideas, let an AI-powered automation do the heavy lifting.

    How it works: You input a topic into Airtable (or another database), which triggers a workflow in Make.com. The AI uses that topic to generate:

    • A list of content angles
    • Related stats or facts
    • Popular subtopics or related trends
    • Potential hooks or titles

    Everything gets logged into a Google Sheet or Notion database for review and use.

    Step-by-Step:

    1. Trigger: Airtable Record Created
      • Use the Airtable “Watch Records” module.
      • Set it to monitor a “Content Ideas” table.
      • Capture fields like: Topic, Target Audience, Tone (optional).
    2. AI Research Prompt (OpenAI Module):
      • Add OpenAI ChatGPT-4 module.
      • Prompt:”You are a content strategist researching ideas for a blog post or campaign. Given the topic ‘{{Topic}}’ and the audience ‘{{Audience}}’, generate:
        1. 3 content angles
        2. 3 surprising stats or insights with real examples
        3. 3 hook ideas or headline starters. Format clearly with numbered sections.”
    3. Parse and Organize (Text Parser or Set Variables):
      • If needed, extract each section into separate fields using Text Parser or Set Variable modules.
    4. Log to Google Sheets or Notion:
      • Add a new row with:
        • Topic
        • Audience
        • Generated angles
        • Hooks/headlines
        • Suggested stats
    5. Optional Enhancements:
      • Add a Slack notification: “New content research ready for review!”
      • Add a filter so only topics marked as “High Priority” trigger AI research.

    Why this helps: You eliminate blank-page paralysis and get rich, contextual research for any content initiative without wasting your team’s time or creativity on preliminary digging.


    The Sales Bottleneck: Manual Follow-Ups & Cold Data

    Sales teams waste hours every week:

    • Manually sorting through low-quality leads
    • Writing cold emails from scratch
    • Logging CRM updates by hand
    • Missing follow-ups because of clunky tools

    With Make.com and AI, you can automate the entire pre-sale pipeline—from qualification to enrichment to personalized outreach—while still keeping it human where it counts.

    Project 1: AI Lead Qualification & Outreach Workflow

    Scenario: Automatically qualify new leads and kick off personalized outreach. Imagine you have a web form or marketing funnel capturing leads. Instead of manually sifting through them, we’ll build a Make.com workflow that uses AI to evaluate each lead’s potential and respond accordingly. High-quality leads will get a custom email (drafted by AI) and be logged in a CRM, while unqualified ones might get a polite decline or be deprioritized.

    How it works: Whenever a new lead comes in (with details like name, company, message, etc.), the workflow triggers. It sends the lead info to an AI (GPT-4o) to determine if the lead is “Qualified” or “Not Qualified,” along with reasoning. Based on the AI’s decision, Make branches into different actions.

    Step-by-Step:

    1. Trigger on New Lead:
      • Use a Webhook module if your lead form sends a webhook
      • Or use a Google Sheets module if leads are collected there
      • Or integrate with your CRM (HubSpot, Pipedrive, etc.)
      Example: If using a form with a webhook, create a Webhook module to receive new lead data like name, email, company, and message.
    2. AI Qualification (OpenAI):
      • Add OpenAI (ChatGPT) module
      • Prompt:System: “You are a sales assistant that qualifies leads for our business.” User: “Lead details: Name: {{name}}, Company: {{company}}, Message: {{message}}. Based on this, decide if this lead is Qualified or Not Qualified for our services, and provide a brief reason. Respond in the format: Qualified/Not Qualified – Reason.”
      This gives you structured output like: “Qualified – The company fits our target profile and expressed interest,” or “Not Qualified – Budget mismatch.”
    3. Branching Logic (Router or IF):
      • Use an IF or Router module to check if the response contains “Qualified.”
      • Route accordingly:
        • Qualified → Follow-up path
        • Not Qualified → Logging or polite response
    4. Qualified Lead Path:
      • Generate Email: Use another OpenAI module to draft a personalized email:Prompt: “Write a friendly email to this lead introducing our services. Use this info: {{lead data + qualification reasoning}}.”
      • Send Email: Use Gmail or SMTP module to send the AI-generated message.
      • Log Lead: Add/update lead in your CRM or Google Sheet.
    5. Unqualified Lead Path:
      • Polite Decline (Optional): Use GPT to generate a kind “not the right fit” email.
      • Internal Log: Mark the lead in CRM or Sheet as disqualified.
    6. Test the Workflow:
      • Use test leads to verify AI outputs and routing logic.
      • Ensure prompt format is consistent for accurate branching.

    Bonus Ideas:

    • Human-in-the-loop Review: Send AI-drafted email to Slack for approval before sending.
    • Scoring instead of binary: Ask AI to score Hot, Warm, Cold.
    • Enrichment before AI: Use Clearbit or Apollo API to add job title, company size, industry.

    Why this helps: Your sales team only sees high-quality leads and can follow up instantly with personalized, AI-written messages.

    Project 2: AI-Powered CRM Enrichment & Follow-Up

    Scenario: Automate enrichment for CRM records and schedule follow-ups based on lead type.

    How it works: Whenever a new contact is added to your CRM (or manually tagged), the workflow enriches the contact (e.g. via Clearbit), uses AI to suggest next actions, and schedules a follow-up reminder.

    Step-by-Step:

    1. Trigger: Watch for a new CRM contact (e.g., HubSpot “New Contact” trigger).
    2. Enrichment: Call Clearbit or similar API to retrieve job title, company data.
    3. AI Recommendation: Use OpenAI:Prompt: “Based on this lead info, suggest next sales action and urgency level. Respond with a 1-sentence summary.”
    4. Create Task: Add to Trello/Asana/Google Calendar or CRM task board.
    5. Notify Salesperson: Slack message or email summary with AI’s next step.

    Why this helps: Keeps your CRM smart and your reps focused on the right next step.

    Project 3: AI Deal Progress Updates to Stakeholders

    Scenario: Keep internal stakeholders updated as deals progress, without constant emails or meetings.

    How it works:

    When a deal stage changes in your CRM, AI summarizes deal context and posts an update to a Slack channel or email digest.

    Step-by-Step:

    1. Trigger: Watch for deal stage change (e.g. from “Demo” to “Negotiation”).
    2. Pull Context: Use previous notes or contact data.
    3. AI Summary: Prompt:“Summarize this deal update with name, stage, client concern, and next step. Make it brief but informative.”
    4. Send Digest: Post to Slack #deals or email manager/team.

    Why this helps: Reduces status meetings while keeping everyone aligned.


    Automation For Product Teams

    Product managers juggle user feedback, bug reports, feature requests, competitor research, roadmap planning, internal prioritization, and stakeholder updates, all at once. It’s chaos. And most of it is repetitive, noisy, and hard to scale.

    With Make.com and AI, you can:

    • Digest qualitative feedback in minutes
    • Summarize feature requests by theme
    • Classify bugs and assign owners
    • Monitor competitor news
    • Auto-generate user stories and release notes

    Let’s walk through a few real workflows.

    Project 1: Feature Request Summarizer & Classifier

    Scenario: Users submit feature requests through a form, support tool, or product portal. Instead of manually reviewing each one, this automation summarizes and categorizes requests using AI, then logs them in your product management system.

    How it works: A new request triggers the workflow. AI (via GPT-4o) reads and classifies the submission (e.g., UX, performance, integrations), writes a short summary, and sends the data to Airtable or Notion for prioritization.

    Step-by-Step:

    1. Trigger: Form Submission or Inbox Monitoring
      • Use the “Webhook” module if collecting feedback via a form (e.g., Typeform, Tally).
      • Or use the “Gmail” or “Intercom” module to watch for new support emails or messages.
      • Capture key fields: name, email (optional), feature request text, and source.
    2. AI Summarization and Categorization (OpenAI Module):
      • Add the OpenAI module.
      • Use the following prompt:”You are a product manager assistant. Summarize the following user feature request in 1–2 sentences. Then categorize it as one of: UX/UI, Performance, Integrations, New Feature, Other. Respond with: Summary: … / Category: …”
    3. Process Output (Text Parser, Set Variable):
      • If needed, parse out “Summary:” and “Category:” into separate fields.
    4. Log to Product Tracker (Airtable/Notion/Google Sheets):
      • Add a module to write the summary, category, and source to your product request tracker.
      • Optional: Add a timestamp and auto-assign priority if source = “VIP” or “internal.”
    5. Bonus Enhancements:
      • Add Slack notifications to alert the product team when a new high-priority request is submitted.
      • Use a Router node to auto-tag requests into different buckets (e.g., roadmap now/later/backlog).

    Why this helps: Instead of skimming dozens of tickets, PMs see a categorized, summarized list ready to evaluate in minutes.

    Project 2: Bug Report Classifier and Assignment

    Scenario: Your support team logs bugs from users. Instead of having a PM manually triage and assign each one, this workflow uses AI to determine severity and auto-assigns to the right team or Slack channel.

    How it works: When a new bug report is added to your tracking system (e.g., Airtable, Google Sheet, or Intercom), the workflow triggers. GPT-4o reads the bug report, labels it by severity, recommends the team, and routes the report to a Jira board or Slack for resolution.

    Step-by-Step:

    1. Trigger: New Bug Logged
      • Use “Airtable – Watch Records” or “Google Sheets – Watch Rows.”
      • Trigger on a new row in your “Bugs” table with fields: Description, Environment, App Version, Submitter.
    2. AI Classification (OpenAI Module):
      • Add the OpenAI module.
      • Prompt:”You are a technical triage assistant. Read this bug description and assign: a) Severity: Low, Medium, High b) Team: Frontend, Backend, Infra, QA Description: {{bug_text}} Respond: Severity: … / Team: …”
    3. Parse Output:
      • Use a Text Parser or Set Variable module to extract the fields.
    4. Routing & Assignment (Router + Slack/Jira):
      • Use a Router module to route based on team.
      • For each branch:
        • Slack: Send bug summary to respective team channel
        • Jira: Create issue with pre-filled metadata
    5. Log Final Record:
      • Update Airtable/Sheet with AI’s classification, routing action, and date.

    Why this helps: Triage happens instantly, teams are alerted without delay, and engineering isn’t bogged down by unclear, unprioritized issues.

    Project 3: Competitor Research Digest

    Scenario: Your product team wants to monitor competitor news (feature launches, pricing changes, new positioning) but no one has time to check their blogs or Twitter every day. Let automation do it for you.

    How it works: Make.com monitors competitor blogs or news feeds using RSS. New content is piped into GPT-4o, which extracts relevant summaries and logs them to Notion or shares them in Slack.

    Step-by-Step:

    1. Trigger: RSS Feed Monitoring
      • Use the “RSS Watch Items” module.
      • Add feeds from competitor blogs (e.g., /news, /blog/rss).
      • Trigger the scenario when new items appear.
    2. AI Summary (OpenAI Module):
      • Add the OpenAI module.
      • Prompt:”You are a product strategist summarizing competitor updates. Summarize the following blog post in 2–3 sentences. Focus on new features, strategic changes, and pricing or positioning shifts.” Input: {{rss_content}}
    3. Routing and Output:
      • Slack: Send formatted summary with post link to #product-intel
      • Notion: Append to a Competitive Insights database (Title, Summary, Source URL, Date)
    4. Optional Enhancements:
      • Add a keyword filter (e.g., only send if post mentions “AI,” “pricing,” “feature,” etc.)
      • Use sentiment analysis to mark as positive/negative/neutral (another AI call)

    Why this helps: Keeps product and strategy teams aware of external moves without manual research, freeing time for response planning or differentiation work.

    Project 4: Generate User Stories from Feedback

    Scenario: You’ve collected raw user feedback from forms, surveys, support tickets, or customer interviews. Now you need to turn that messy, unstructured input into clear, actionable user stories. Let AI write the first draft for your backlog.

    How it works: Whenever feedback is marked as actionable or tagged with “feature request,” Make.com sends it to GPT-4o. The AI rewrites it in proper user story format and logs it to your dev tracker (Notion, Airtable, Trello, Jira, etc.).

    Step-by-Step:

    1. Trigger: Tagged Feedback Entry
      • Use “Watch Records” (Airtable) or “Watch Database Items” (Notion).
      • Set a filter: Only run if field ‘Type’ = “Feature Request.”
    2. Prompt AI to Generate User Story (OpenAI Module):
      • Prompt:”You are a product manager preparing backlog items. Turn this raw feedback into a user story using this format: ‘As a [user role], I want to [goal/action], so that [benefit].’ Feedback: {{feedback_text}}”
    3. Post-processing (Optional):
      • Add a sentiment analysis module (e.g., another AI call) to assess urgency.
      • Use Router to assign story to the correct product squad based on keyword/topic.
    4. Log Story:
      • Notion: Add to product backlog database
      • Airtable: Insert as a new story row
      • Jira/Trello: Create new ticket with AI-generated description
    5. Notify Stakeholders (Optional):
      • Slack alert to product owner: “New story added from feedback: {{story}}”

    Why this helps: Turns raw, unstructured user data into clean, consistent backlog items—without product managers rewriting every ticket themselves.


    HR Teams: Automate Onboarding and Employee Insights

    HR teams are buried under repetitive, time-consuming tasks:

    • Answering the same policy questions again and again
    • Sorting resumes manually
    • Drafting internal emails and updates

    AI automations free up time for strategic people ops work while giving employees faster responses and a better experience.

    Project 1: AI-Powered HR Slack Assistant

    Scenario: Employees constantly ask HR about leave policies, benefits, or internal procedures. This workflow creates an AI-powered Slack bot that answers common questions instantly.

    How it works: Employees post questions in a designated Slack channel. Make.com captures the question, sends it to GPT-4 (with your handbook or policies as context), and posts the AI-generated answer back in the thread.

    Step-by-Step:

    1. Trigger:
      • Use Slack’s “Watch Messages in Channel” module
      • Monitor #ask-hr or a similar channel
    2. AI Response (OpenAI):
      • Prompt: “You are an HR assistant. Use the following context from our handbook to answer questions. If you don’t know the answer, say so. Question: {{message_text}}.”
      • Provide a static section of company policy or use a database API to insert context
    3. Respond in Thread:
      • Post the AI-generated answer as a reply to the original Slack message
    4. Fallback Handling:
      • If AI is unsure, route to a human HR rep with a notification

    Why this helps: Reduces HR interruptions while improving employee experience with instant, contextual answers.

    Project 2: Resume Screening Assistant

    Scenario: You receive a high volume of applicants and need to quickly assess fit for a role based on resumes and job descriptions.

    How it works: Applicants submit resumes through a form or ATS. Make.com collects the submission, sends it to GPT-4 with the job description, and receives a scored summary with a short rationale.

    Step-by-Step:

    1. Trigger:
      • Watch new form submission or integrate with ATS (e.g., Google Form, Typeform)
      • Collect name, resume text (or file), and job applied for
    2. AI Fit Evaluation (OpenAI):
      • Prompt: “You are an HR recruiter. Based on this job description and the applicant resume, rate this candidate as High, Medium, or Low Fit. Provide a 1-sentence reason.”
        Input: {{resume}}, {{job_description}}
    3. Parse Response:
      • Extract score and reason using text parser or Set Variable
    4. Log Result:
      • Add to Airtable or Google Sheet for internal review
    5. Optional:
      • Notify hiring manager via Slack if rating is “High Fit”

    Why this helps: Quickly filters high-potential candidates without sifting through every resume manually.

    Project 3: Personalized Onboarding Sequence Generator

    Scenario: New hires need to go through onboarding. Instead of sending the same emails manually or giving them generic documents, generate a tailored onboarding plan.

    How it works: When a new hire is added to Airtable or your HRIS, GPT-4o generates a personalized onboarding checklist and intro email based on their role and department.

    Step-by-Step:

    1. Trigger:
      • Watch for a new employee record in Airtable (or Google Sheet or BambooHR)
    2. Generate Plan (OpenAI):
      • Prompt: “You are an HR onboarding assistant. Based on this employee’s name, role, and department, write a custom onboarding checklist for their first 2 weeks. Also generate a welcome email.”
    3. Send Outputs:
      • Email the onboarding checklist and welcome message to the new hire
      • Optionally send a copy to their manager
    4. Log or Archive:
      • Save plan to a shared onboarding doc or Notion database

    Why this helps: Makes onboarding feel personal and organized without HR lifting a finger.


    Support Teams: Automate Ticket Triage And Responses

    Customer support is repetitive by nature, but that doesn’t mean it should be manual. With AI and automation, you can:

    • Instantly classify and route tickets
    • Auto-draft replies to common questions
    • Summarize conversations for handoffs or escalations
    • Proactively flag critical issues

    Let’s break down a few powerful workflows you can launch today.

    Project 1: AI-Powered Ticket Triage Bot

    Scenario: Incoming support tickets vary widely. Some are technical, others are billing-related, some are spam. Instead of human agents triaging each one manually, AI can analyze and route them to the right person or tool.

    How it works: Make.com monitors your support inbox or form. For each new ticket, GPT-4o classifies it (Billing, Technical, Account, Spam) and assigns urgency. Based on the result, the ticket is routed to the correct Slack channel, person, or tool.

    Step-by-Step:

    1. Trigger:
      • Watch new entries from Gmail, HelpScout, Intercom, or a form tool like Typeform.
      • Capture subject, message body, and metadata.
    2. Classify Ticket (OpenAI):
      • Prompt:“You are a support assistant. Read the message below and categorize it as one of: Billing, Technical, Account, Spam. Also assign an urgency level (Low, Medium, High). Respond like: Category: …, Urgency: …”
    3. Parse Output:
      • Use a Text Parser or Set Variable module to extract Category and Urgency
    4. Route Based on Logic:
      • Use a Router or Switch module
      • Route Technical → #support-dev, Billing → #support-billing, etc.
      • Notify urgent issues in a priority Slack channel or tag a team lead
    5. Log for Analytics (Optional):
      • Save categorized tickets to Airtable or Sheets for trend tracking

    Why this helps: Your team spends less time sorting and more time solving. Escalations are never missed.

    Project 2: AI Auto-Responder for Common Questions

    Scenario: Many support tickets are variations of the same FAQ: password resets, refund policies, shipping delays. Let AI draft helpful responses automatically, ready for human review or direct sending.

    How it works: When a new ticket arrives, GPT-4o reviews the content and drafts a relevant reply using company policy snippets or a knowledge base.

    Step-by-Step:

    1. Trigger:
      • Monitor new support tickets via Help Desk or form integration
    2. Draft Response (OpenAI):
      • Prompt:“You are a support rep. Read this customer message and write a helpful reply using our policies: {{kb_snippets}}. Message: {{ticket_text}}”
    3. Review Flow:
      • Send AI draft to Slack for human review (or assign a Google Doc comment task)
      • Use Slack emoji as approval trigger, or set manual override option
    4. Send Response:
      • Upon approval, send email via Gmail, Outlook, or HelpDesk API

    Why this helps: Reduces response time for repetitive inquiries and gives your team a first draft to edit instead of starting from scratch.

    Project 3: Conversation Summary Generator for Escalations

    Scenario: When tickets get escalated across teams, agents spend time writing summaries of what’s happened so far. Use AI to generate this summary instantly.

    How it works: When a ticket is tagged for escalation or transfer, Make.com grabs the conversation thread and asks GPT-4o to summarize the key points.

    Step-by-Step:

    1. Trigger:
      • Tag change or status update in HelpScout/Intercom (e.g., “Escalated”)
    2. Summarize Conversation (OpenAI):
      • Prompt:“Summarize this customer support conversation: who is the customer, what’s the issue, what’s been tried, and what’s needed next. Format as: Summary: … / Next Action: …”
    3. Send to Escalation Path:
      • Post to Slack or assign Jira/Trello task with summary included
      • Tag original agent and team lead

    Why this helps: Handoffs are cleaner, faster, and no critical context is lost.

    Start with something small

    The best way to get started building automations is with something small and non-critical. If it fails, it shouldn’t bring the house down.

    Over time, as you get comfortable with this, you can add on more complexity and transition from automations to autonomous AI agents.

    If you need help with any of this, email me.